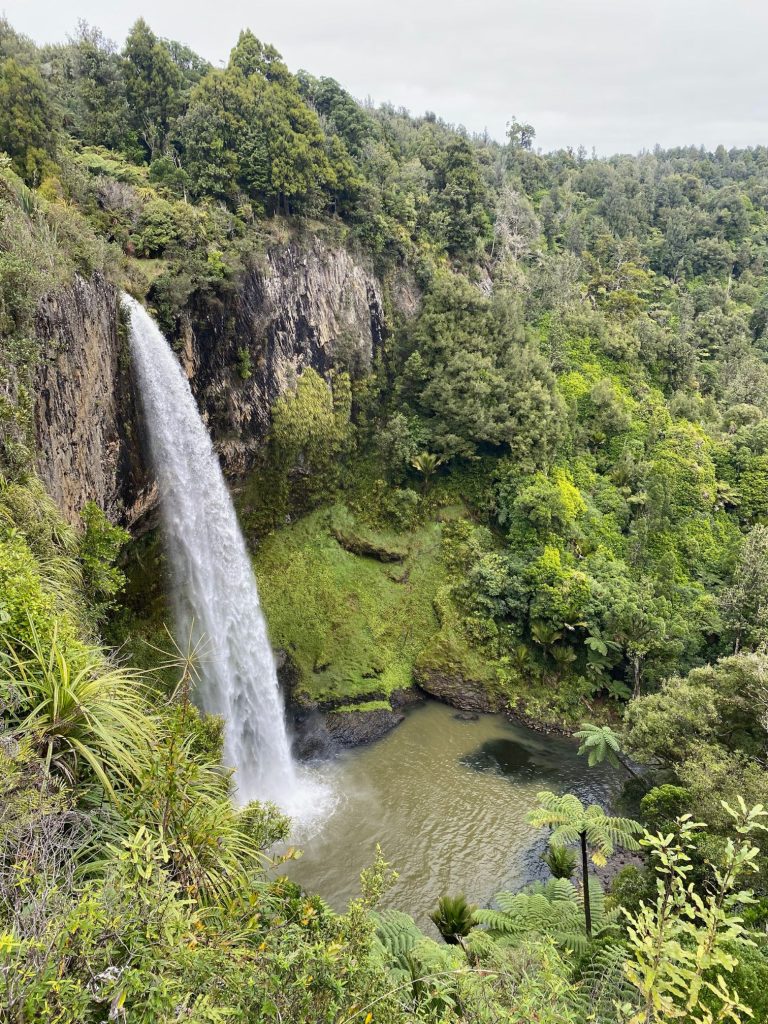
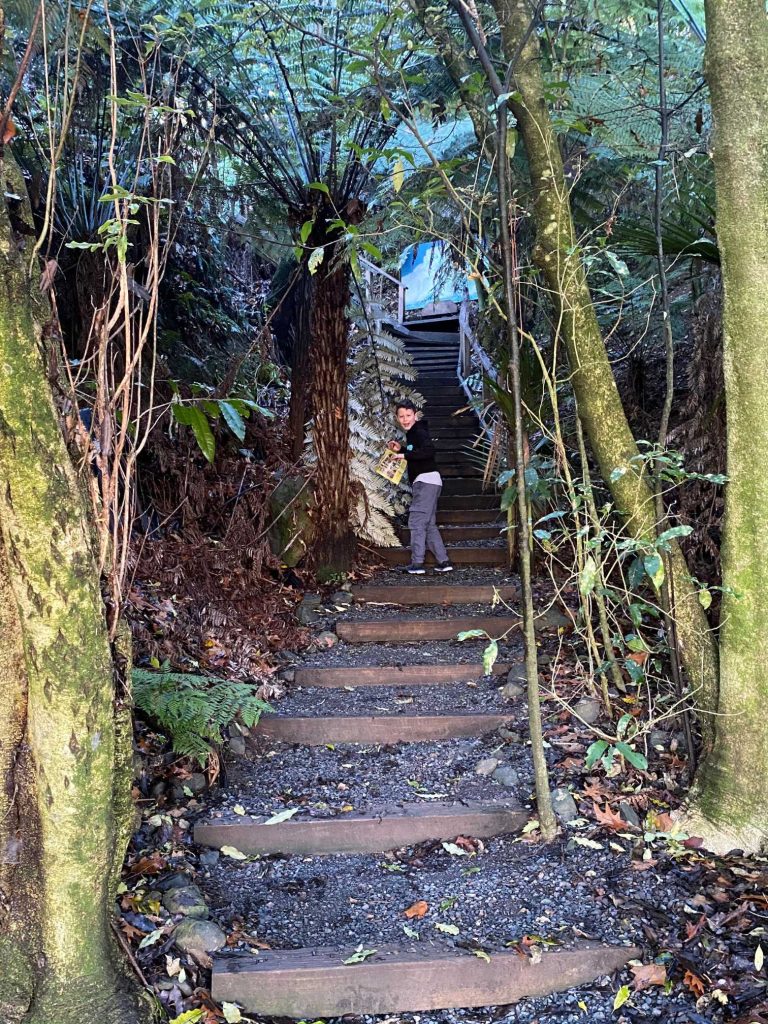
Hello gardeners! Welcome to Ozzy’s garden! This post is about Bridal veil falls, Raglan, in a wonderful forest, by a beautiful river. Enjoy reading!
Bridal veil is at a height of 180 feet, with a ten minute walk from top to bottom, with a total of 261 steps. There are four viewing platforms, one on the top of the falls, looking down on the brim of the falls, one a few minutes walk down overlooking the edge of the edge of the falls. As you walk down the steps into the lower half, stop at the mid-way view point, showing the cascading water fly by, then make your way to the bottom bridge, where you see the landing of this spectacular waterfall.
I hope you have learned a lot about this beautiful waterfall, and I hope you get to go one day.
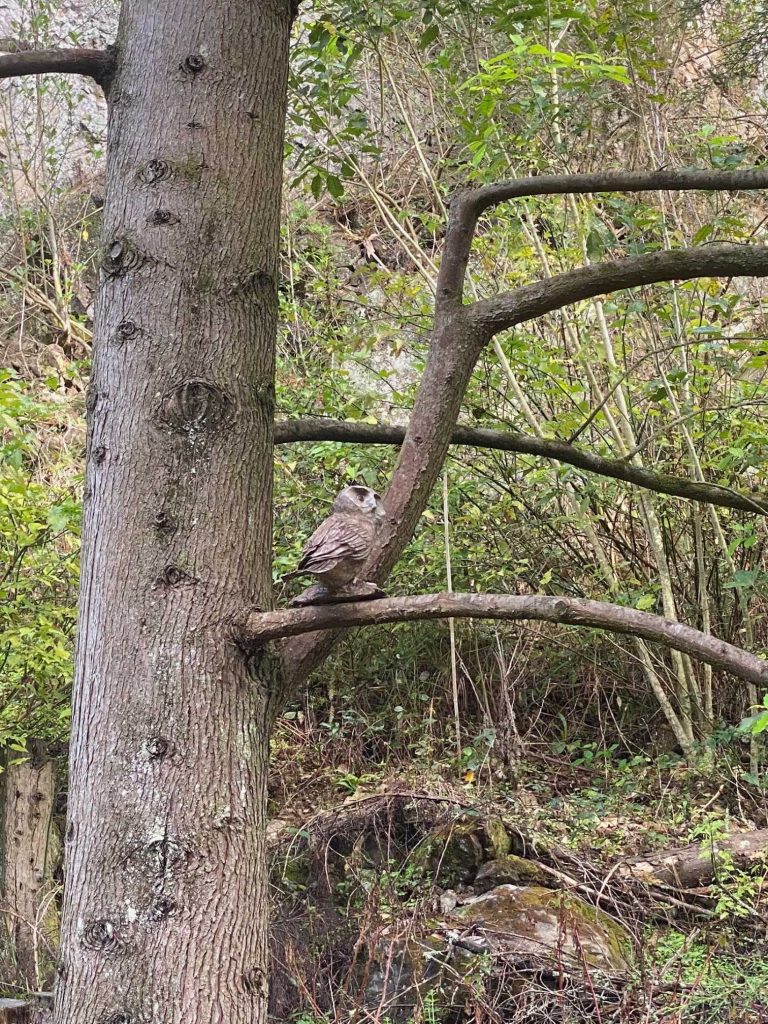
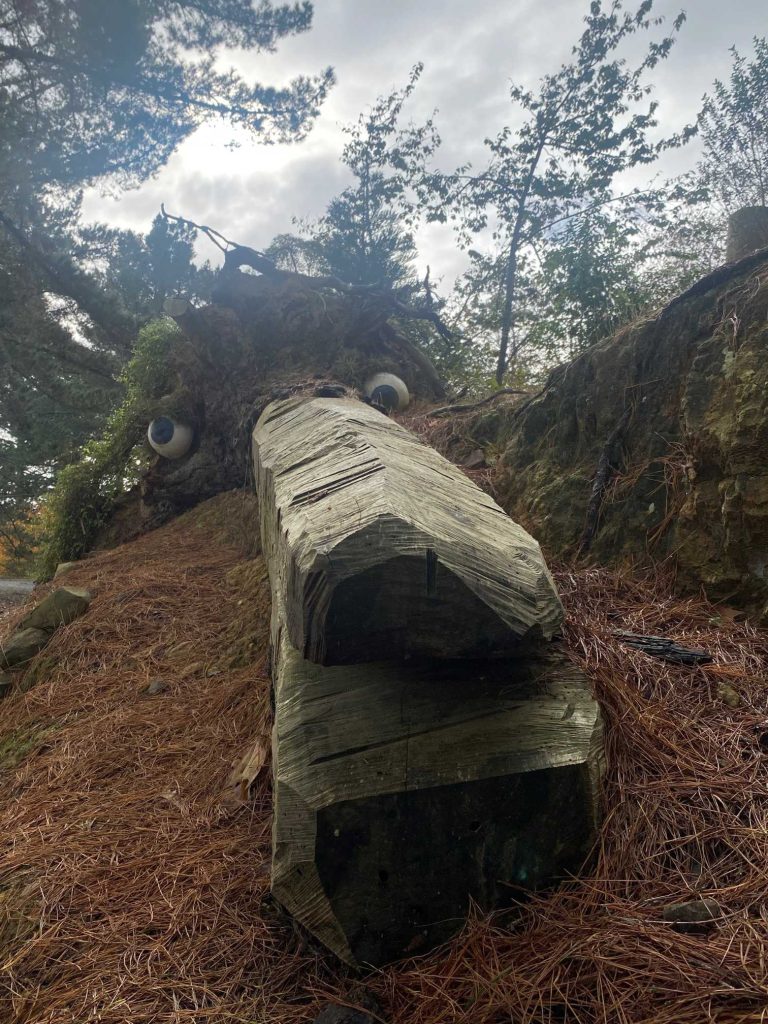
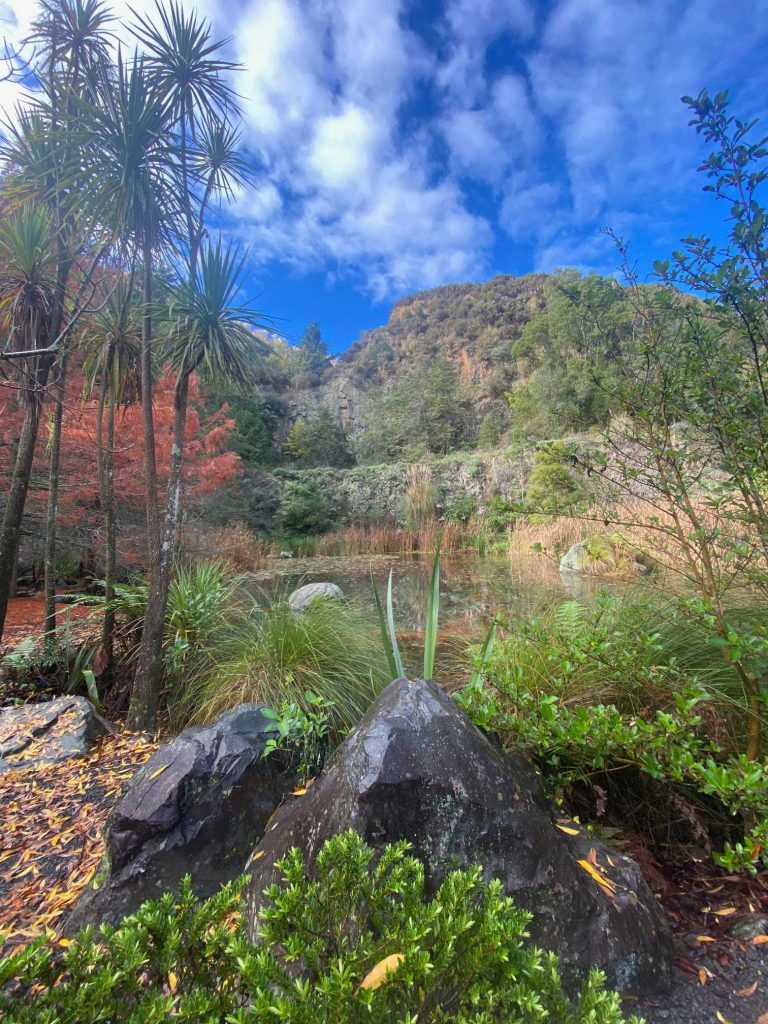
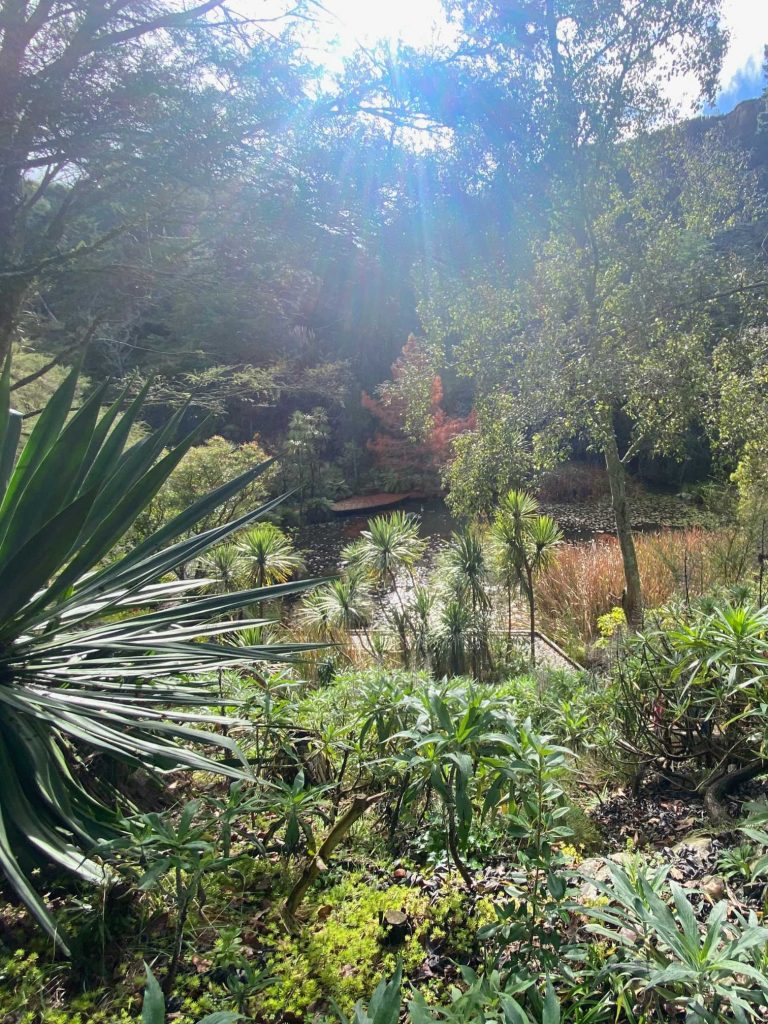
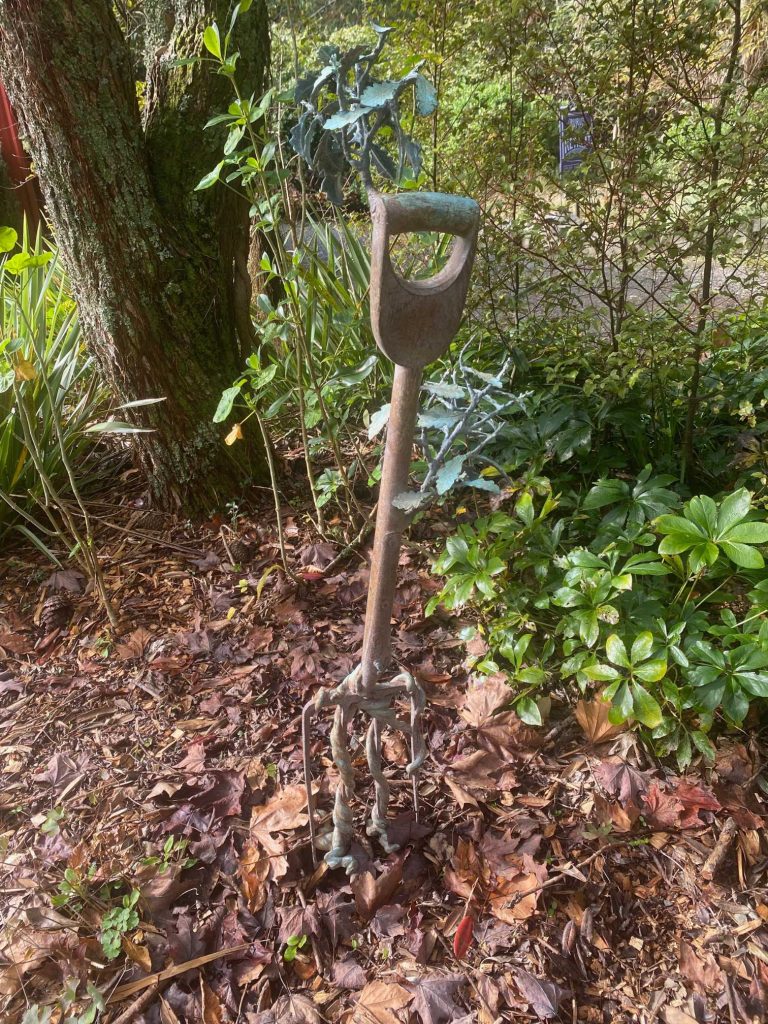
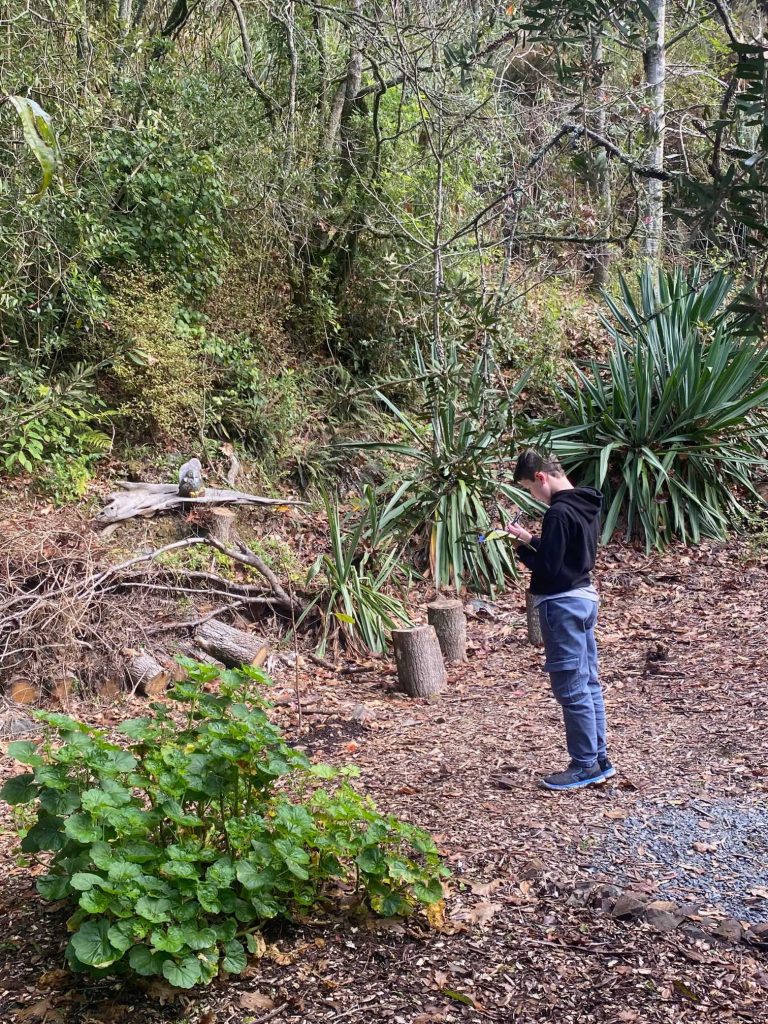
Hello gardeners! Welcome back to Ozzy’s Garden. A few days ago we went to the Waitakaruru Arboretum in New Zealand, a lovely sculpture park in the woods, about ten minutes outside of the city, a lovely walk for all those who come there. Here is everything about it!
As you first head to the front desk have a go at the Ruru trail. See if you can spot some of the Ruru statues hiding through out the walk! There are fifteen in total, we managed to find twelve out of the fifteen. No-one has found all fifteen yet, the record is currently fourteen. If you get a chance to go, (Which I strongly advise) have a go to find all of them. See if you can find a real Ruru having a sleep in or on a tree! Once you’ve found more than five, head back to the desk and post it to possibly win a prize!
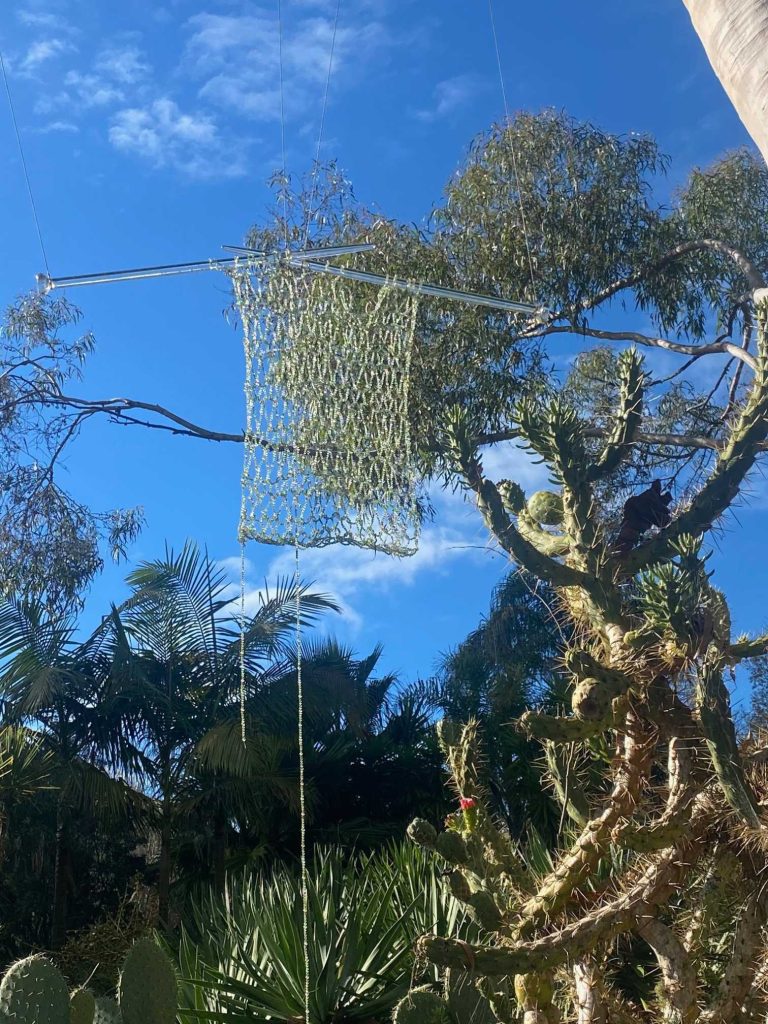
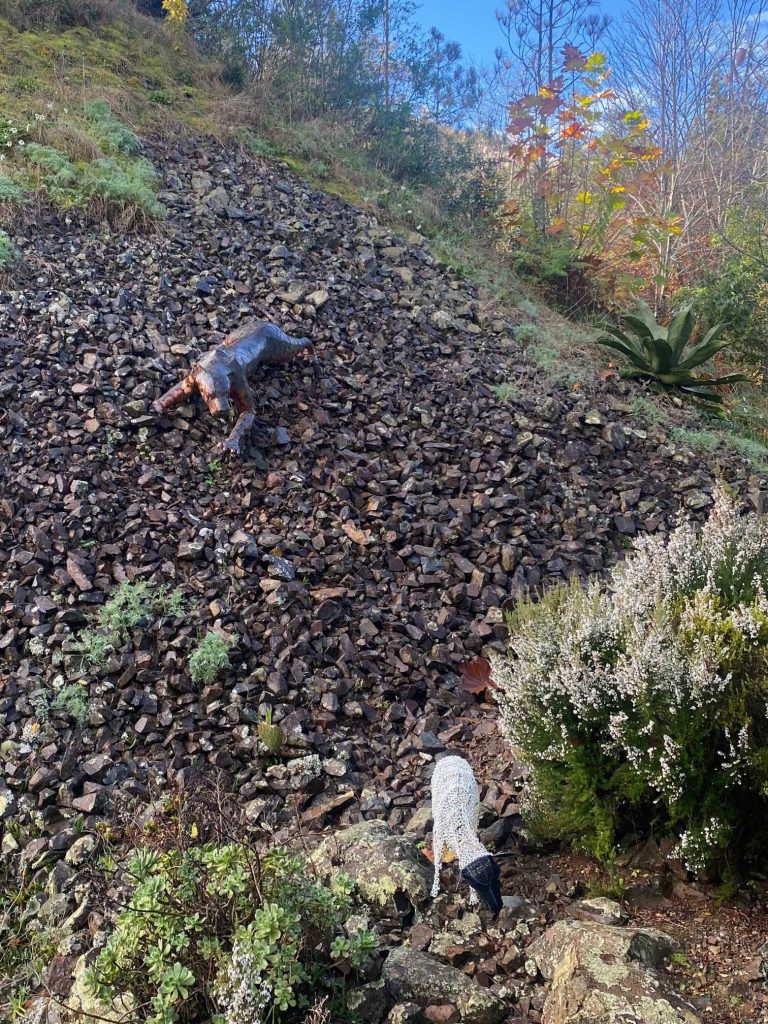
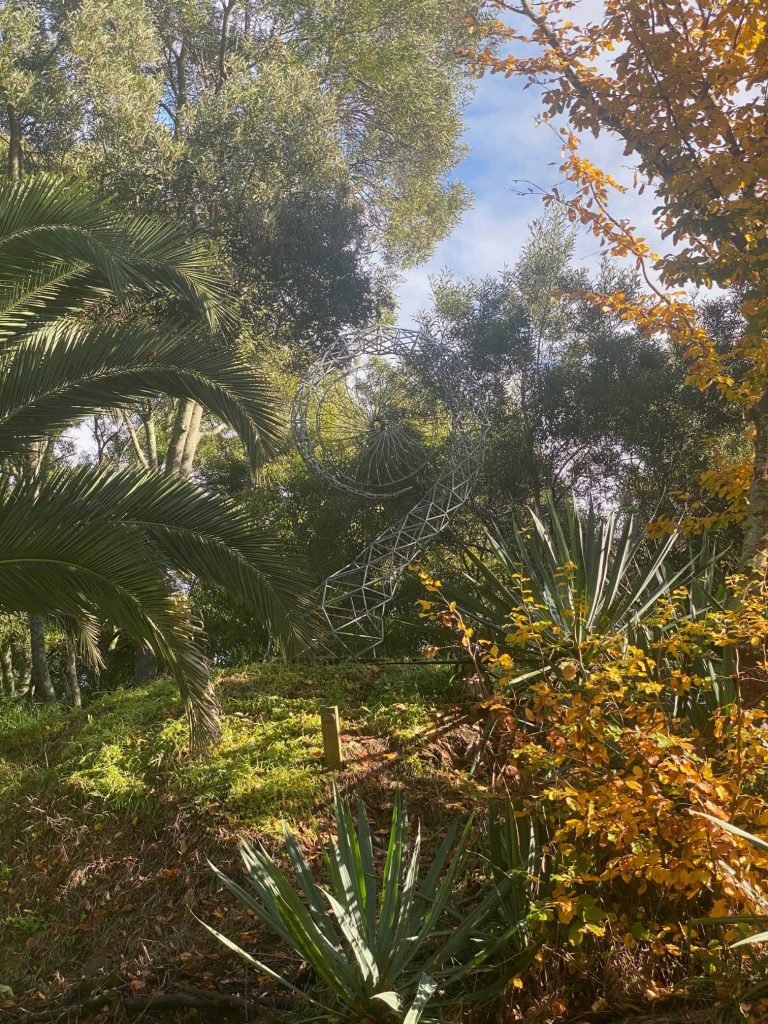
As you trek around the gardens, look for some of the beautiful sculptures along the trail in the park, they can be anywhere, all with wonderful proportion. Some are pictures of things, and some are just fun, wacky shapes, or sentences formed in art! There is over one hundred sculptures to find, can you find all of them? Here are some of the ones we found, will you find more?
As you trek this amazing walk, stop by some of the side routes and visit places especially made as different countries of the planet. As you walk through this multi-country biological tour, try and spot your national place, and explore what it would feel like to be in another part of the world like the U.S., plant wise.
I really hope you get the chance to visit the Waitakaruru Arboretum, I found it brilliant and I hope you do to!
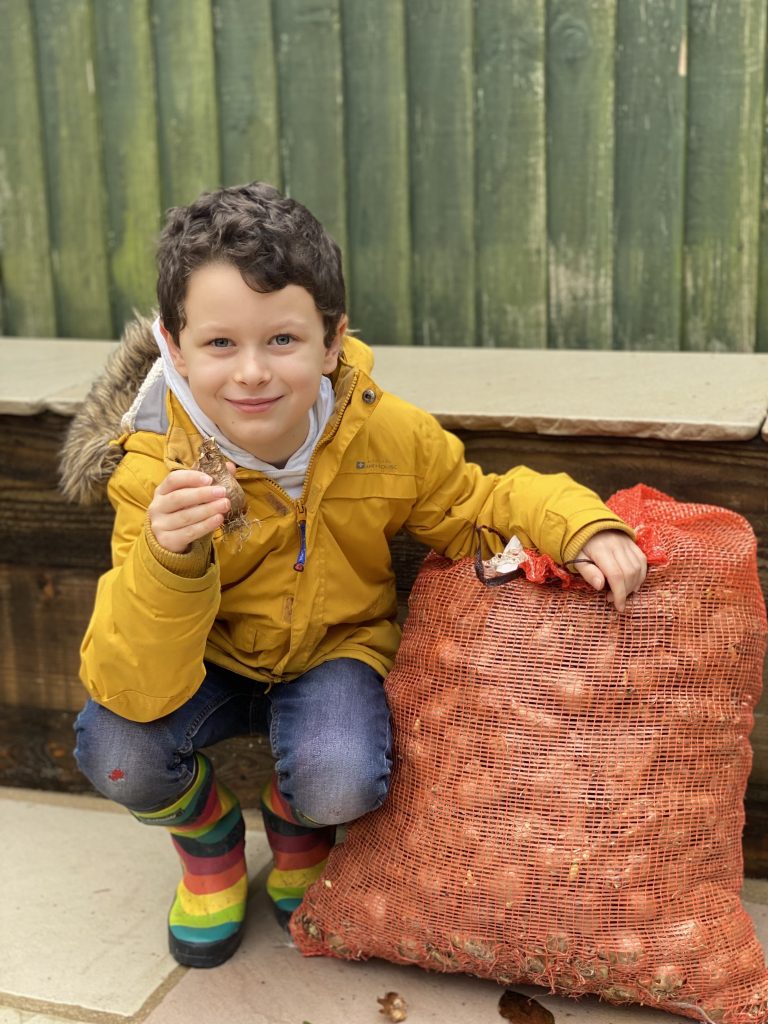
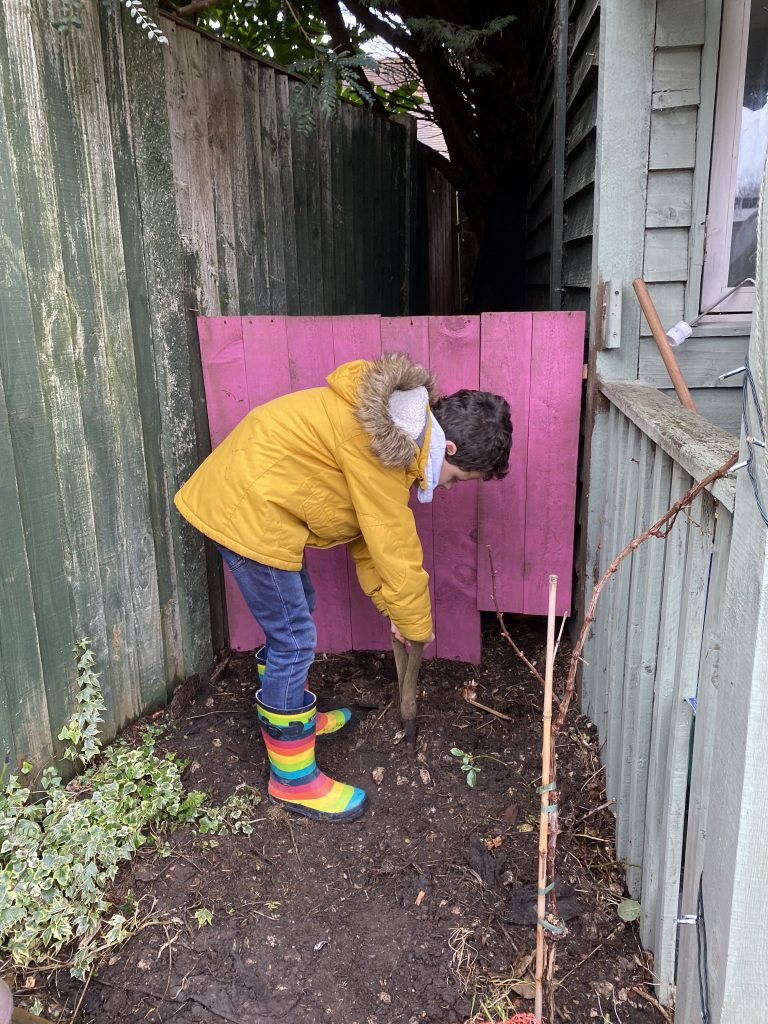
Happy 2022! I hope you had a wonderful Christmas and enjoyed the holidays.To make it all nice for the Spring (and because Daddy bought loads of bulbs) we planted daffodils.
Not all of them will grow because we planted them a little late in December 2021 and you should plant them in November.
We planted them in patches and pots. They need to be 1 to 2 inches into the soil to survive the Winter and grow. We were growing lots of individual bulbs in small pots on our driveway to give to people walking past in the Spring! We are also going to put some in pots to go around mummy’s craft room.
Hello gardeners, I hope your pumpkins are starting to grow. In this post I would like to introduce you to the hedgehog house.
This year my school had a visit from Harper Asprey Wildlife Rescue, they came to tell us about all their work with Hedgehogs.
Here are 5 interesting facts you might like about hedgehogs.
Hedgehogs can flatten themselves to get through a 3 inch gap sometimes 2!
2. Some hedgehogs are good swimmers! But they need to be able to climb up something to get out of the water.
3. Hedgehogs think bugs and slugs are yummy.
4. A baby hedgehog is called a “Hoglet”.
5. A hedgehog can grow from 90 grams up to 1160 grams
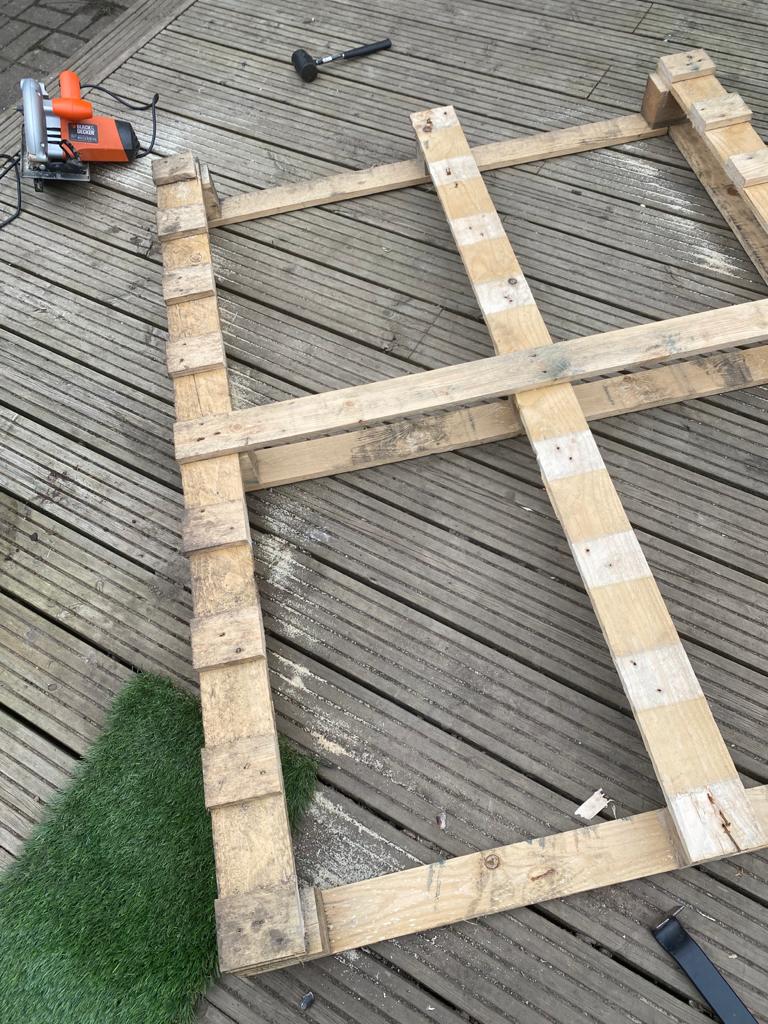
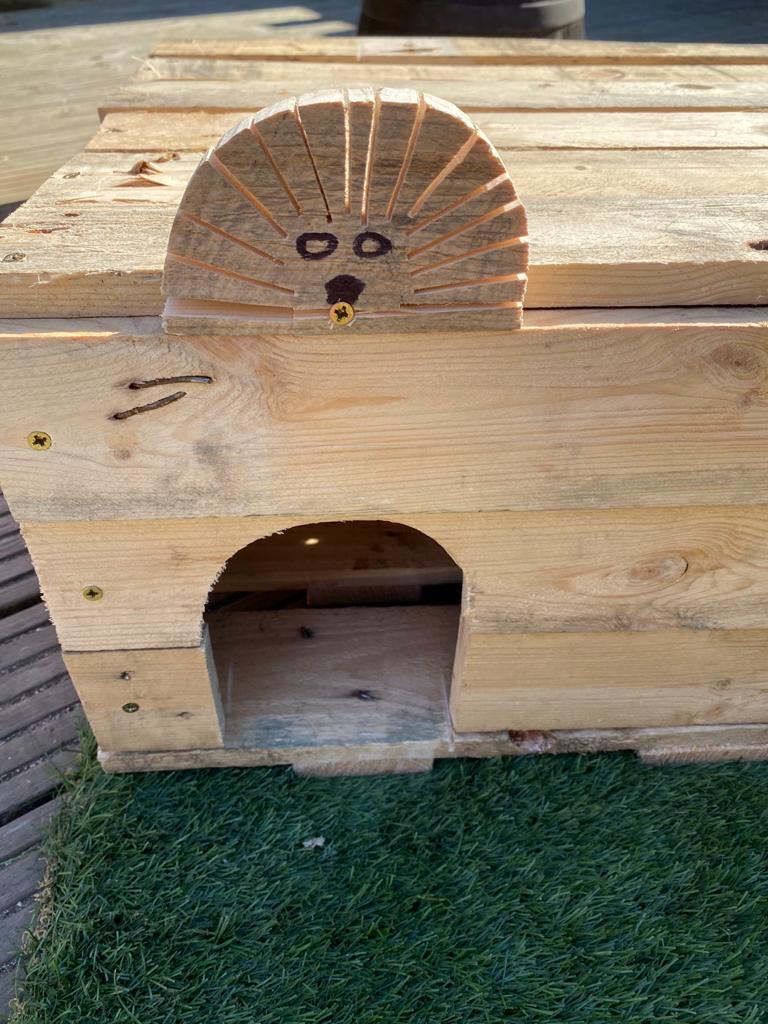
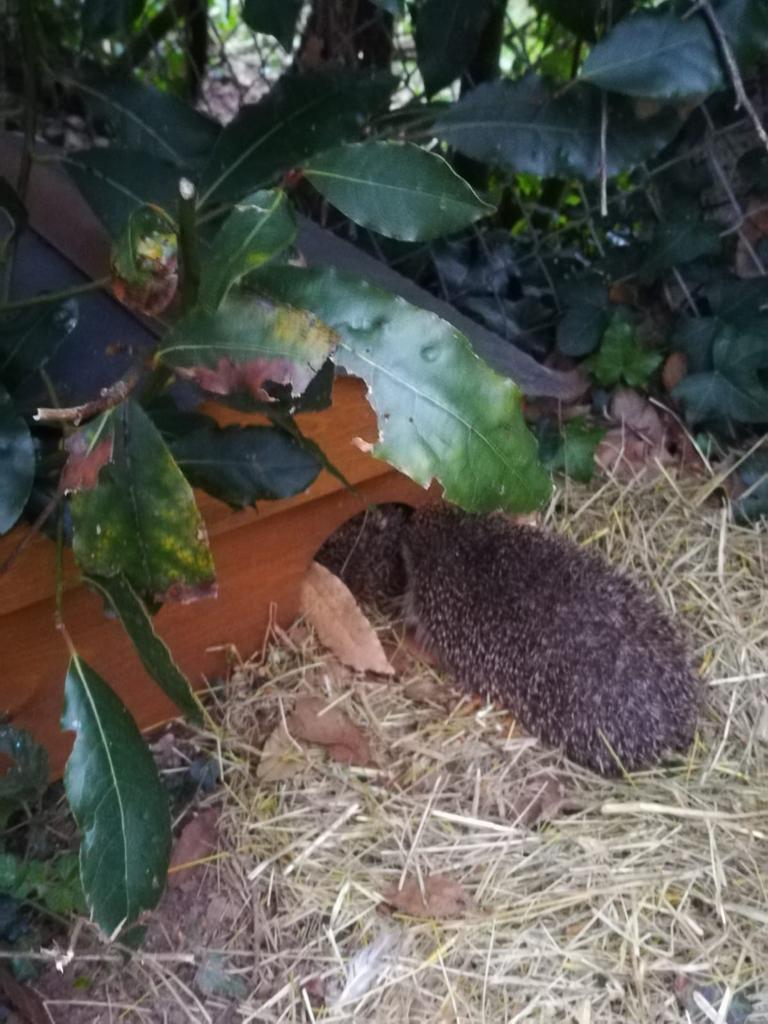
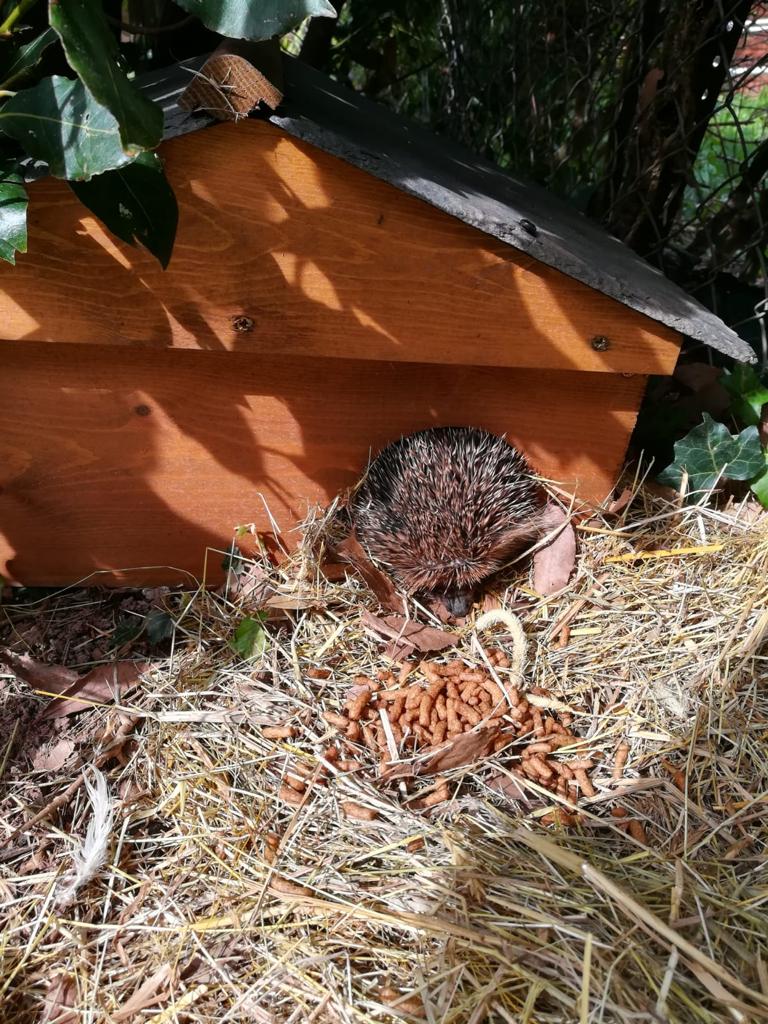
The Pallet Hedgehog House
We made the Hedgehog House from a pallet by sawing up small planks. Here are the steps we took:
1: Sketched the plan
To make sure we used as much of the pallet as we could, I started by creating a design of the Hedgehog House. I thought of a donut shape, a semi circle and a house with two floors, but in the end we made a rectangle shaped house with one floor. It’s very important to have a design to follow, make sure you take the time to draw your hedgehog house.
2: Measure and Cut the Pallet
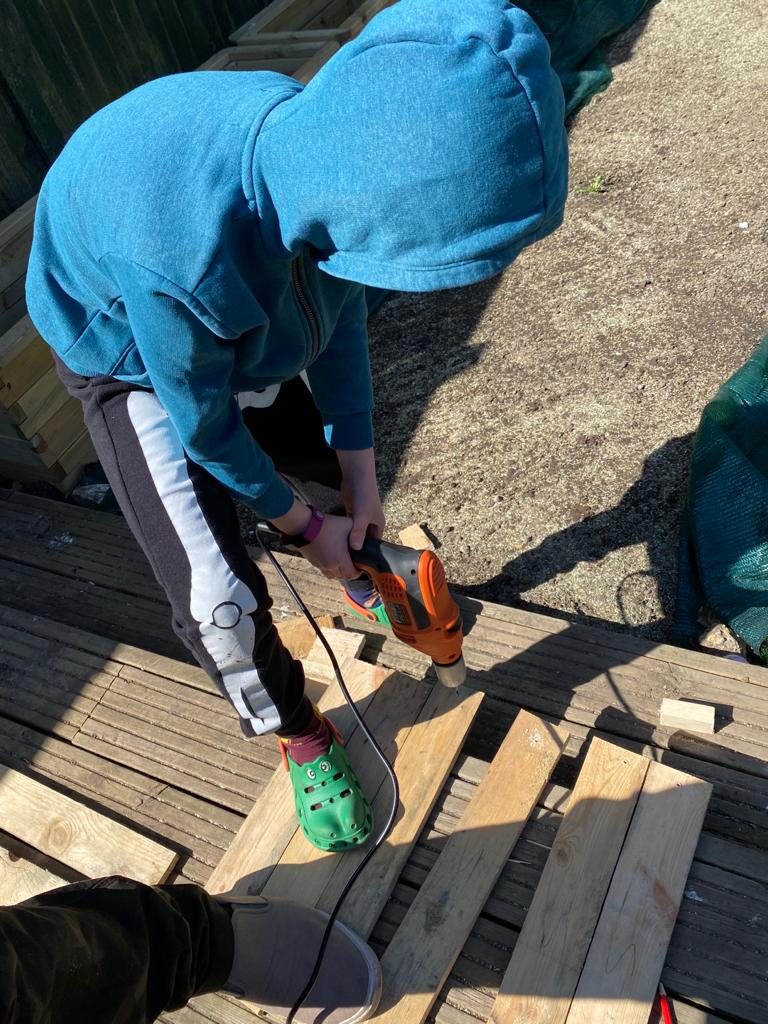
Now we have the design we can start to measure and mark out the parts of the pallet we want to cut and use. This step requires and adult as you will need a saw, I asked my Daddy to help.
3: Screw it together
We put all the cut pieces of wood in piles, based on size. We had a pile for the walls, floor and roof – we wrote on the pieces of wood to label which were which.
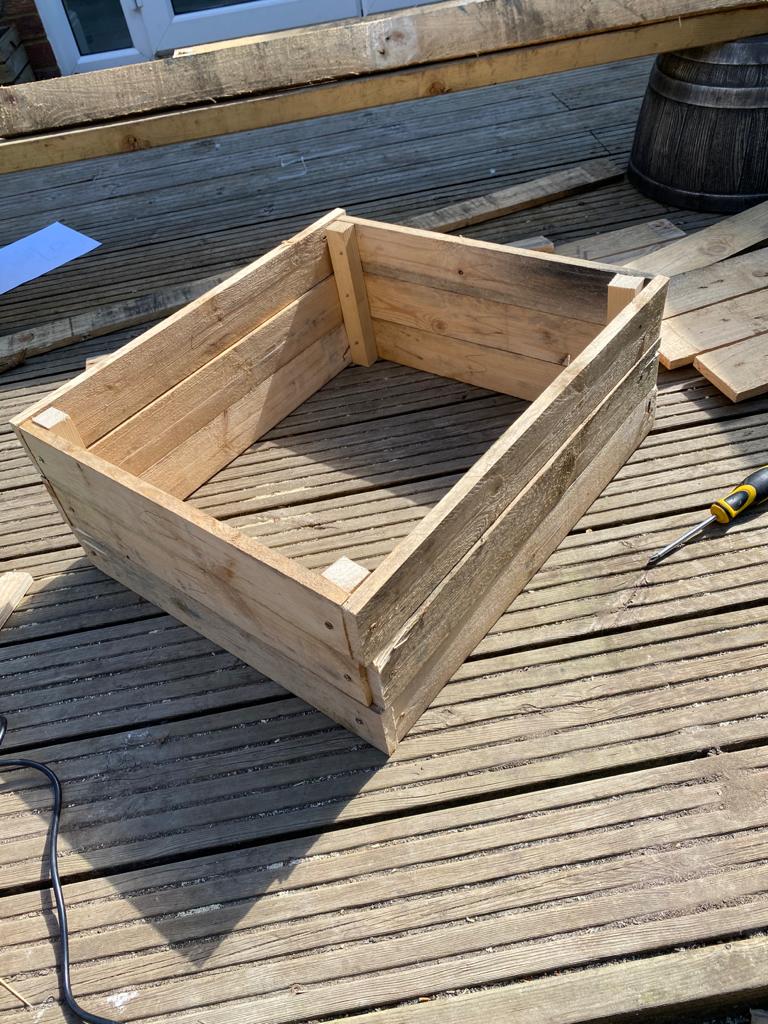
To make it easier to screw the planks together, we drilled holes in each end of the planks of wood. We then started putting the walls together, so we created a right angle with a front and side plank and then put a support on the inside that we could screw into. Our walls were three planks high, so we made sure we cut the supports to fit that height.
Once all the walls were screwed together, we had a shape similar to a square / rectangle.
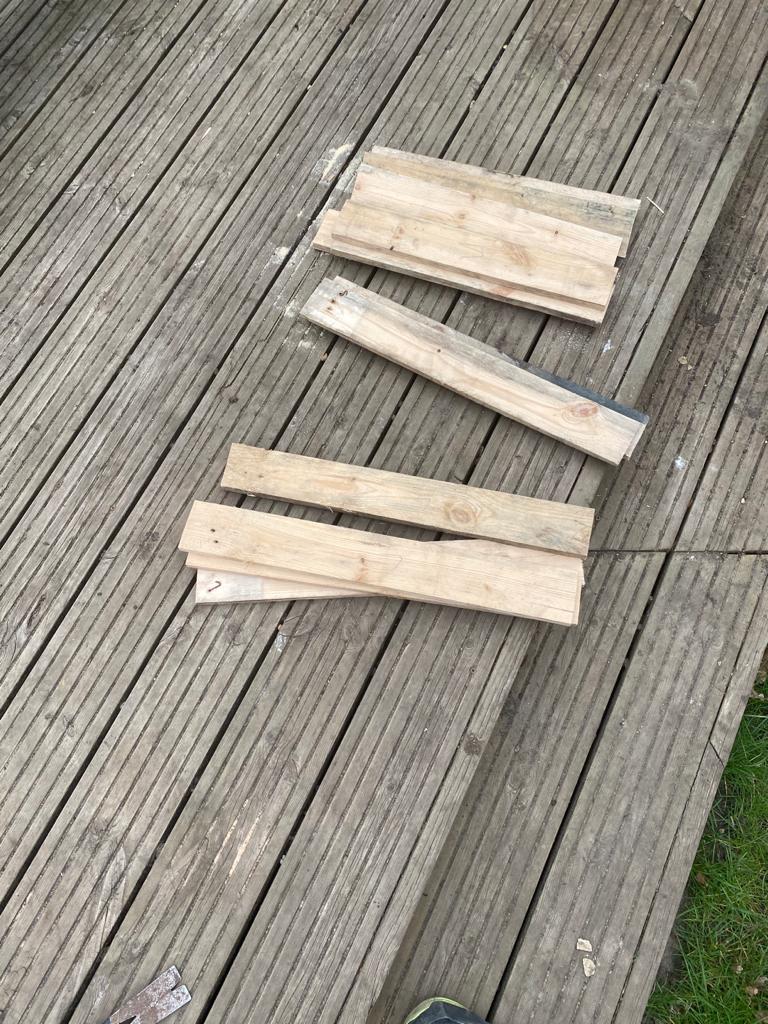
4: Adding the floor and roof
To strengthen the house we now attached the floor, our floor had small wooden wedges underneath, little bit like feet! This was to let air and bugs creep into the house for the Hedgehogs. You will have lots of off cuts from the pallet to create these wedged feet.
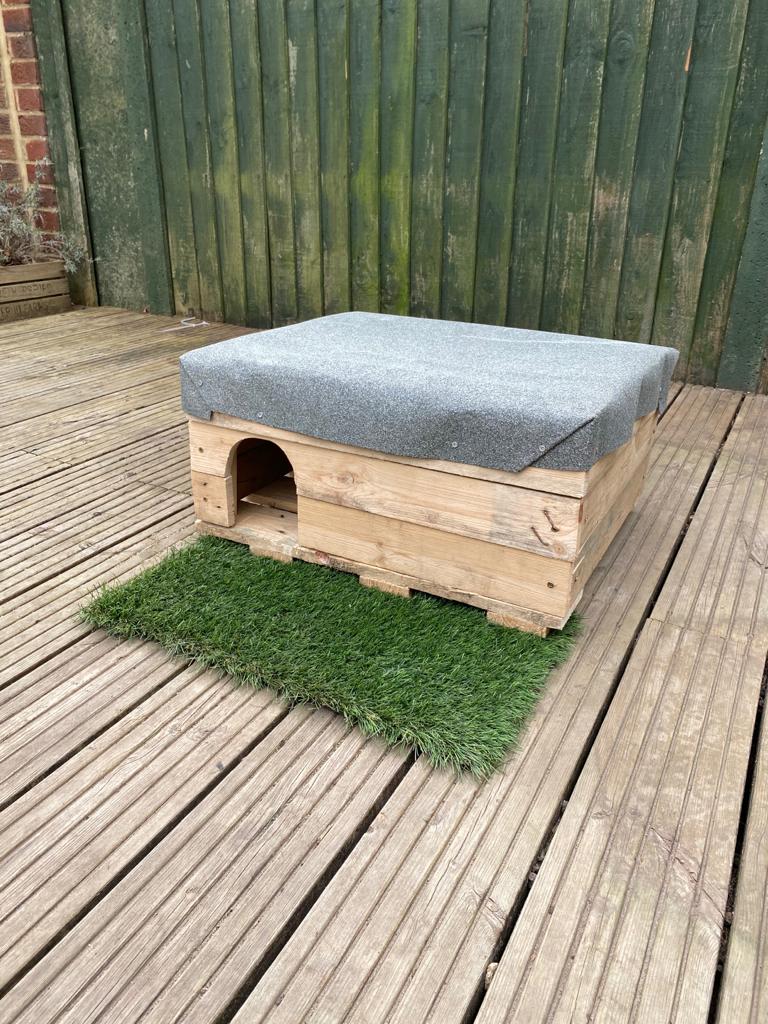
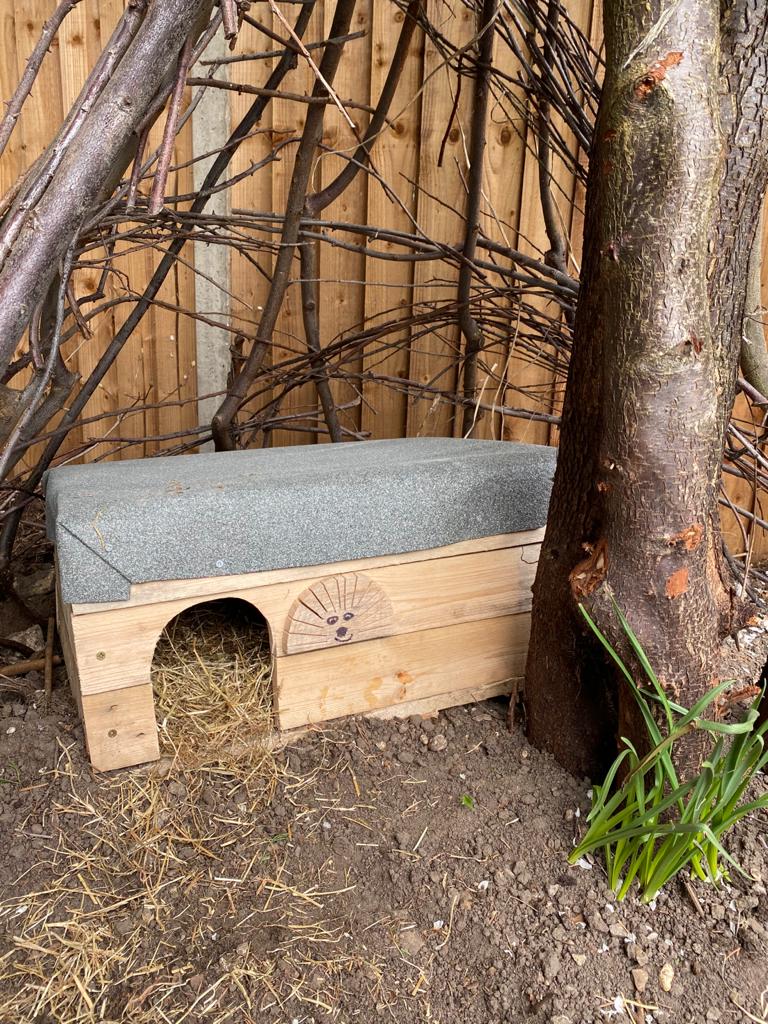
To keep it warm and dry we covered the wooden roof with some roofing felt, so the Hedgehogs can stay warm and dry in the cold, wet weather. This was really easy to cut and we attached it with very small screws.
5: Cut the doorway
We then cut a nice big doorway for the hedgehogs to get into their new home. We first drew it on and then I asked my Daddy to cut it out for me. We also made a friendly looking hedgehog sign from the left over pallet and glued that to the front of the house.
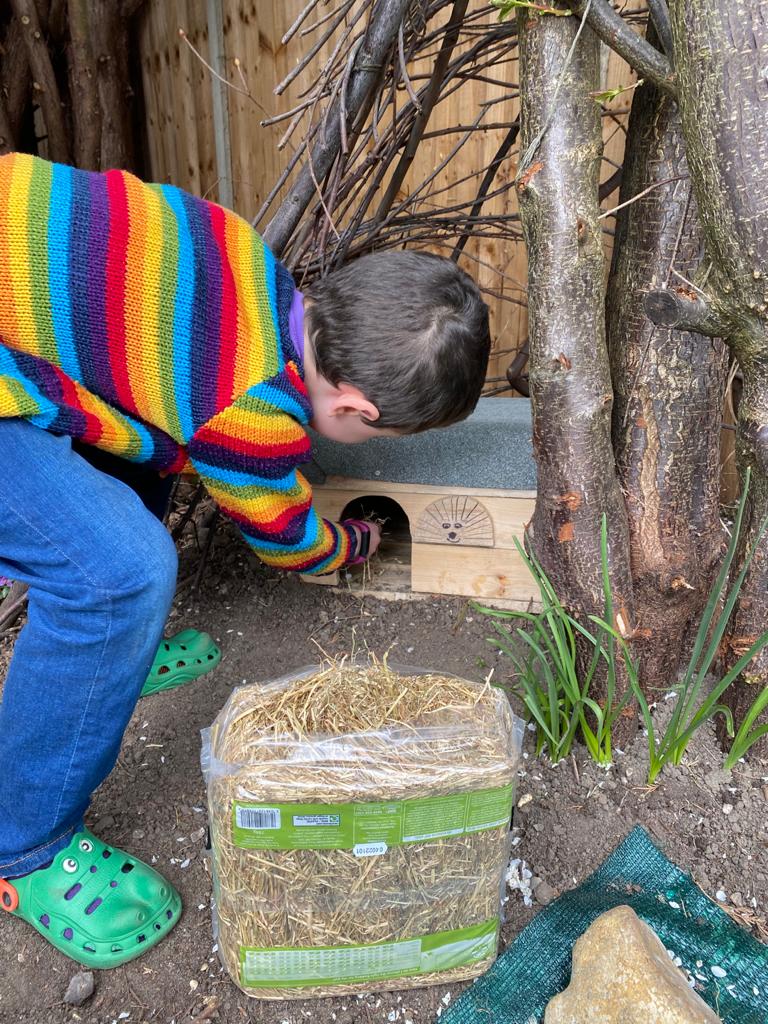
6: Put some straw
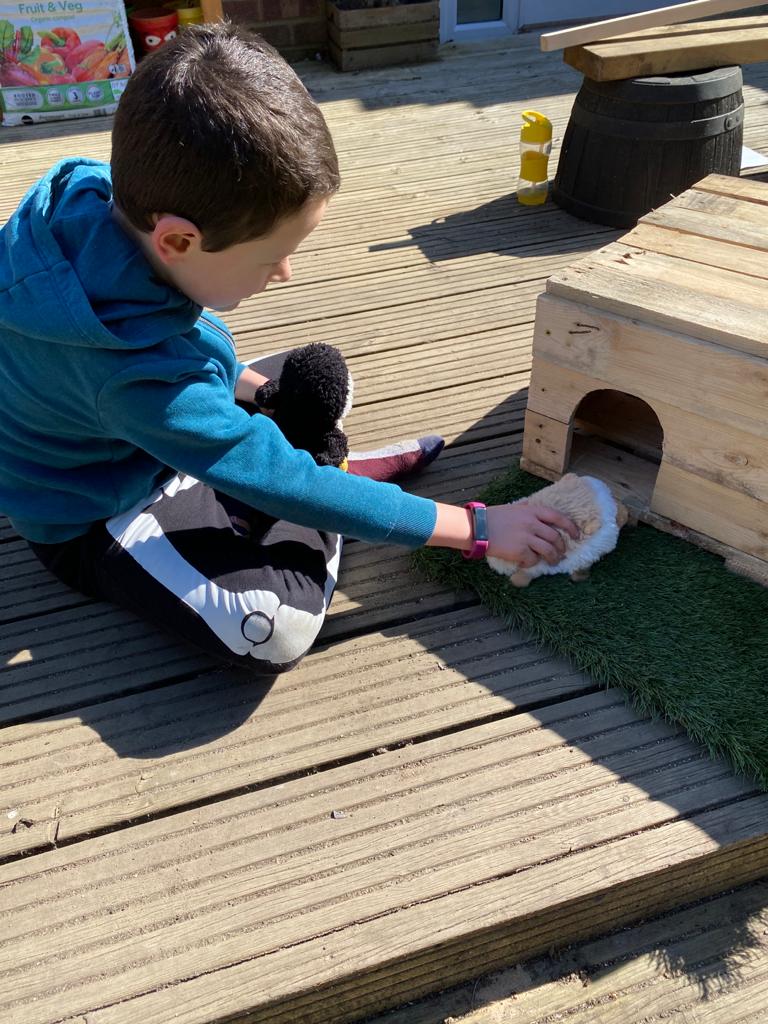
Finally, we put some straw into the house, so that they’re nice and comfy when they hibernate in the winter.
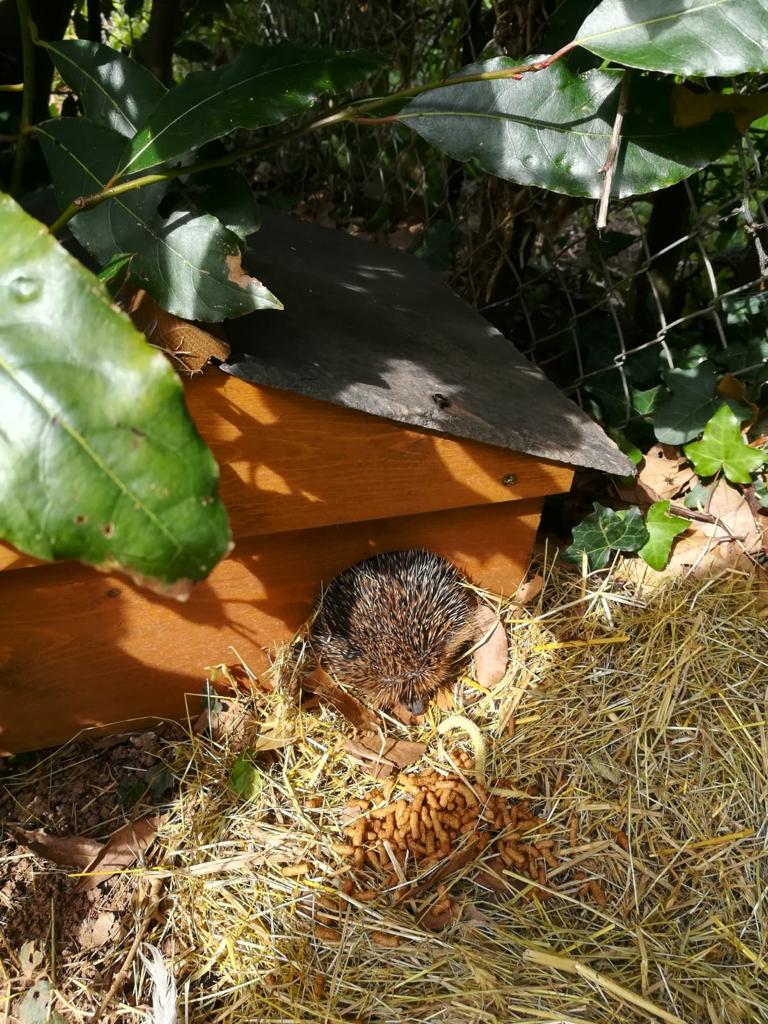
The hedgehogs haven’t moved in to their new home yet, but we do think we have some living in the garden somewhere.
Last year I bought my Nannie a hedgehog house for her garden, she now has a whole family of Hedgehogs and Hoglets living in her garden.
Please share this post with your friends and family as it’s very important to look after the wildlife in your garden. Also, if you have time, send in photos of your Pallet Hedgehog Houses.
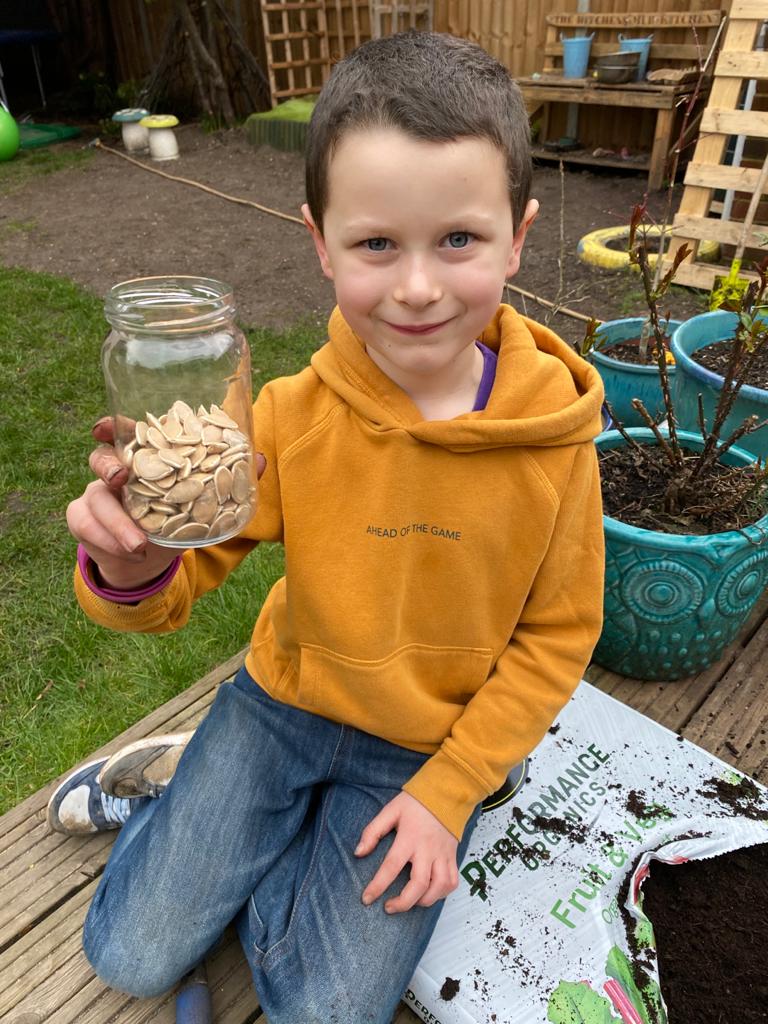
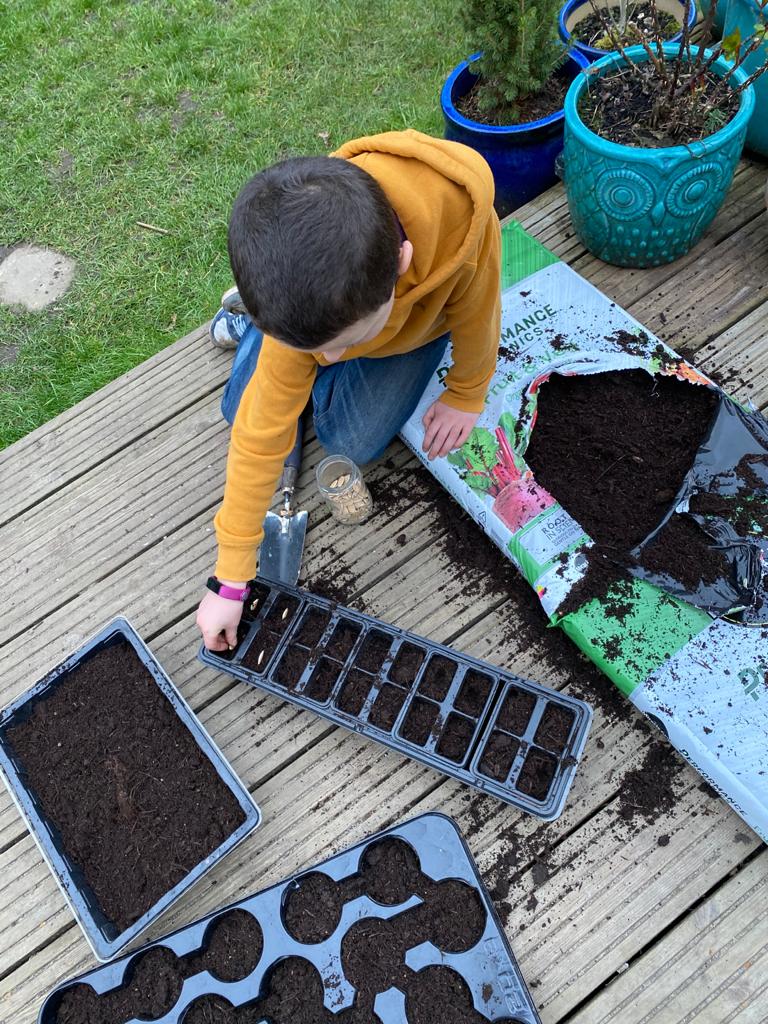
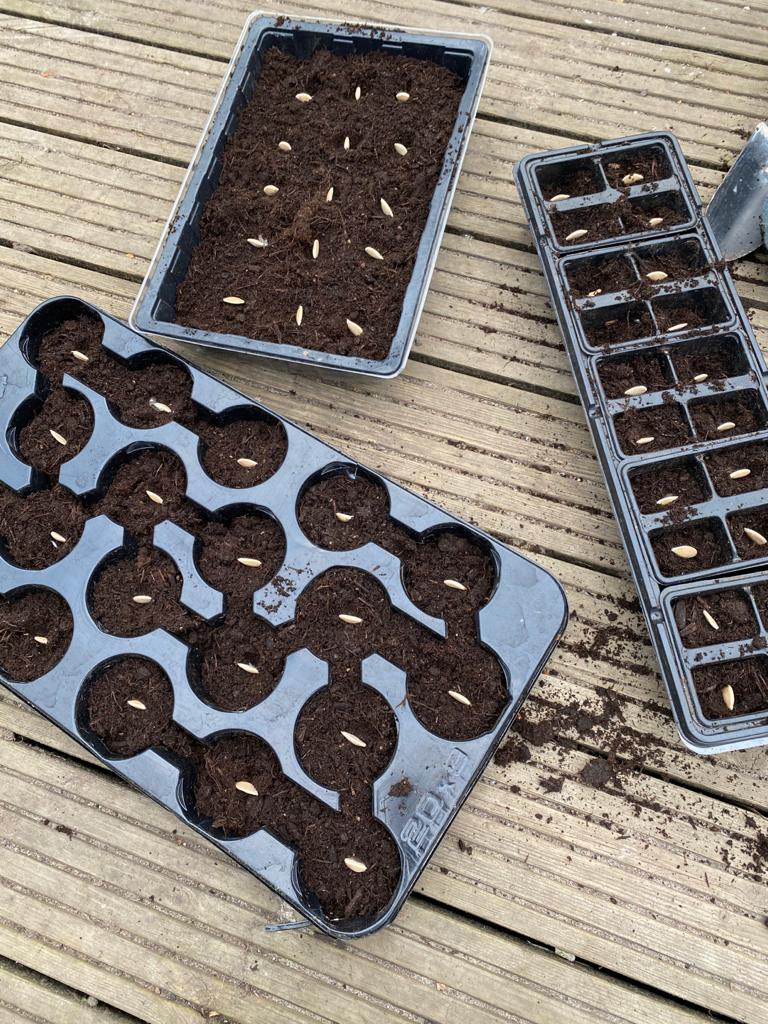
This year, 2021, I am opening a Pumpkin Growing Competition. Anyone who wants to be in the competition must leave a comment on this post. The rules are simple, you must grow a pumpkin from seed (ideally from the Ozzy’s Garden seeds I sent at Christmas) and share your photos with me over the summer. The person who grows the biggest pumpkin will be crowned the Pumpkin King or Queen on 31st October 2021.
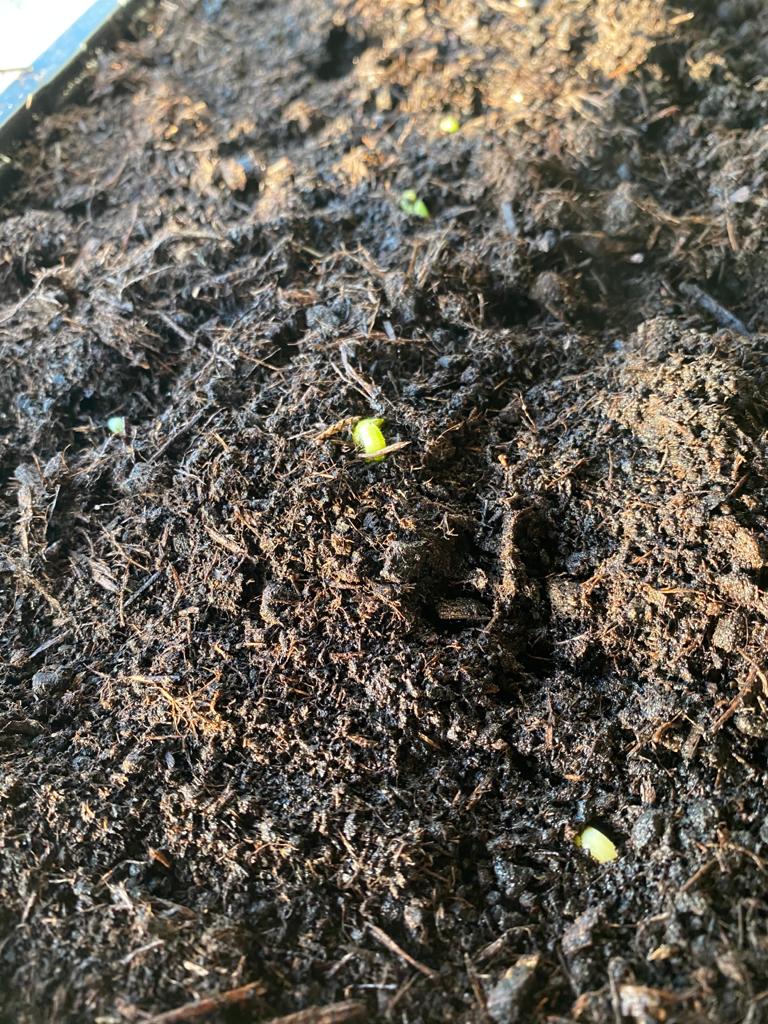
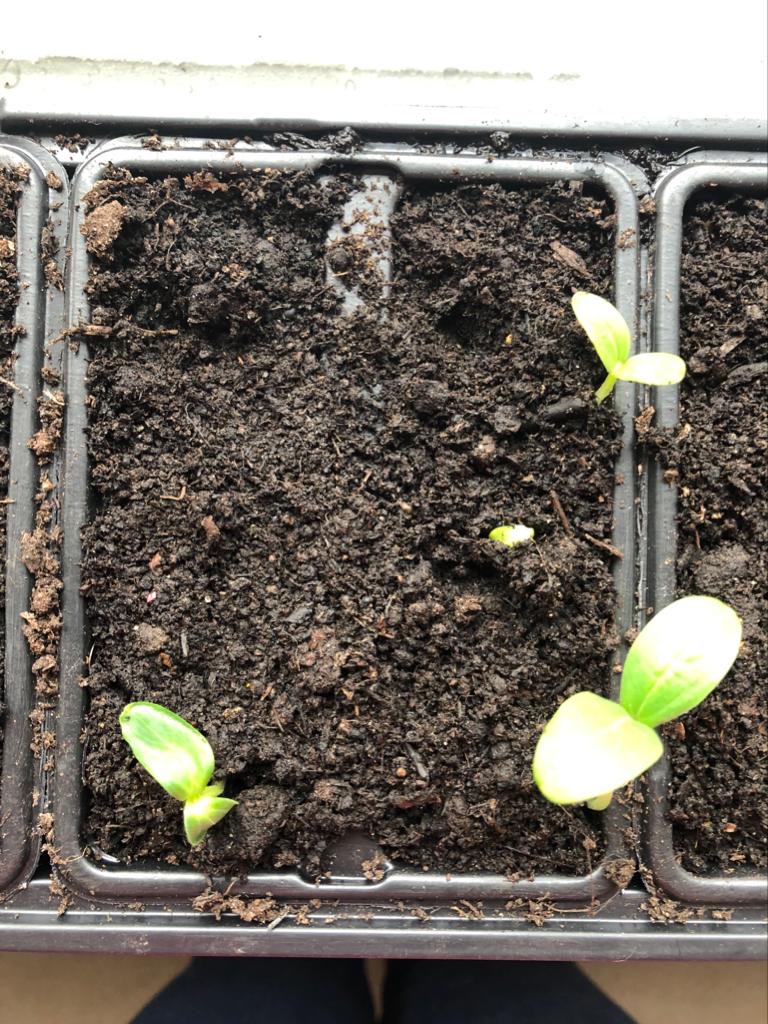
I’ve already planted my seeds on the 21st March and they’ve been growing on the windowsill, this week all the seedlings have started to appear.
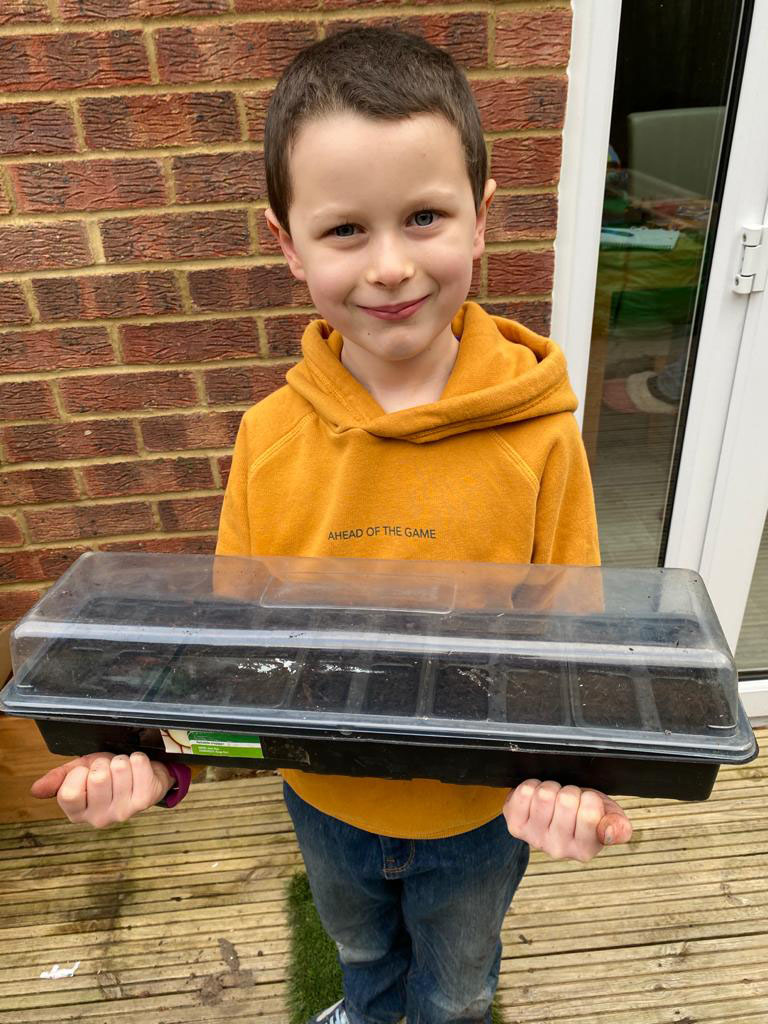
As of today, I have 29 Pumpkin Seedlings! In a few weeks, when I know which ones are going to be strong pumpkins, I will be doing a Pumpkin Plant Giveaway for anyone who wants to join the competition.
Top Tip: Plant bright coloured plants to attract more bees. I’ve planted Nasturtium seeds for when the Pumpkin Plants go into the ground. Here’s a picture of them.
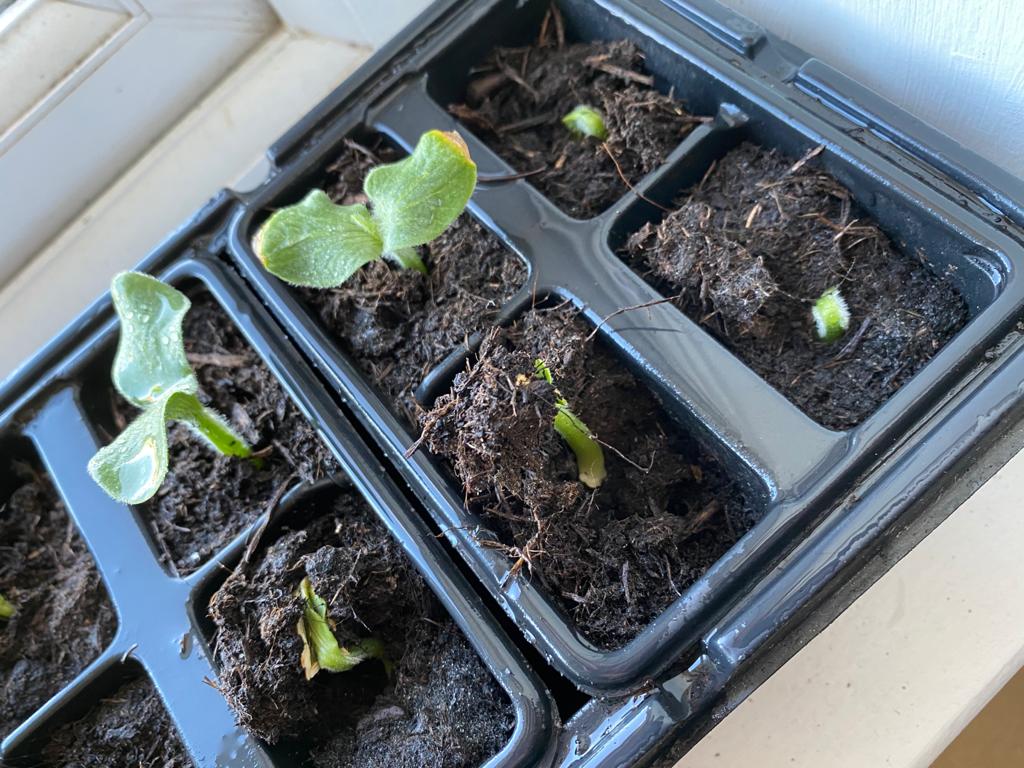
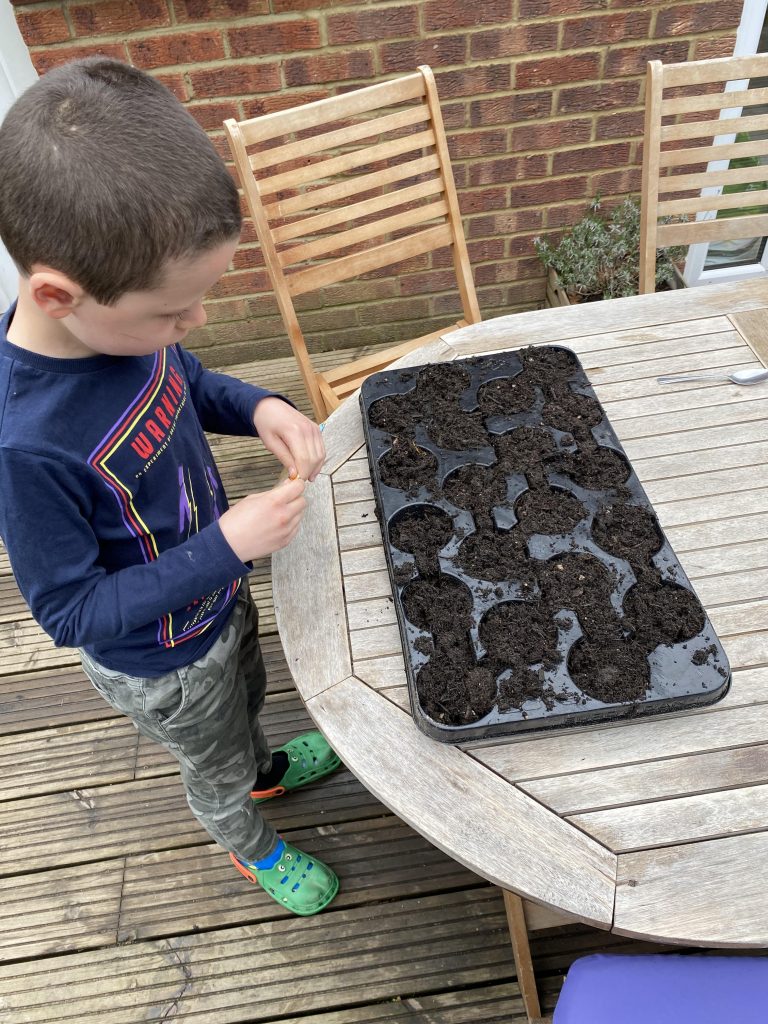
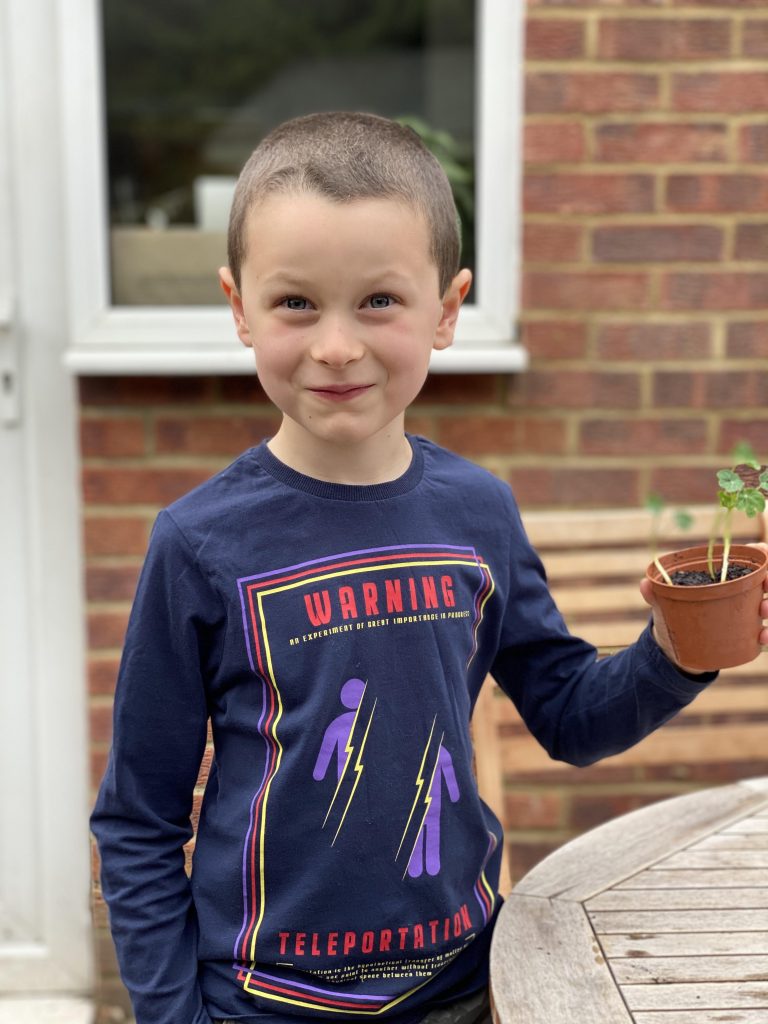
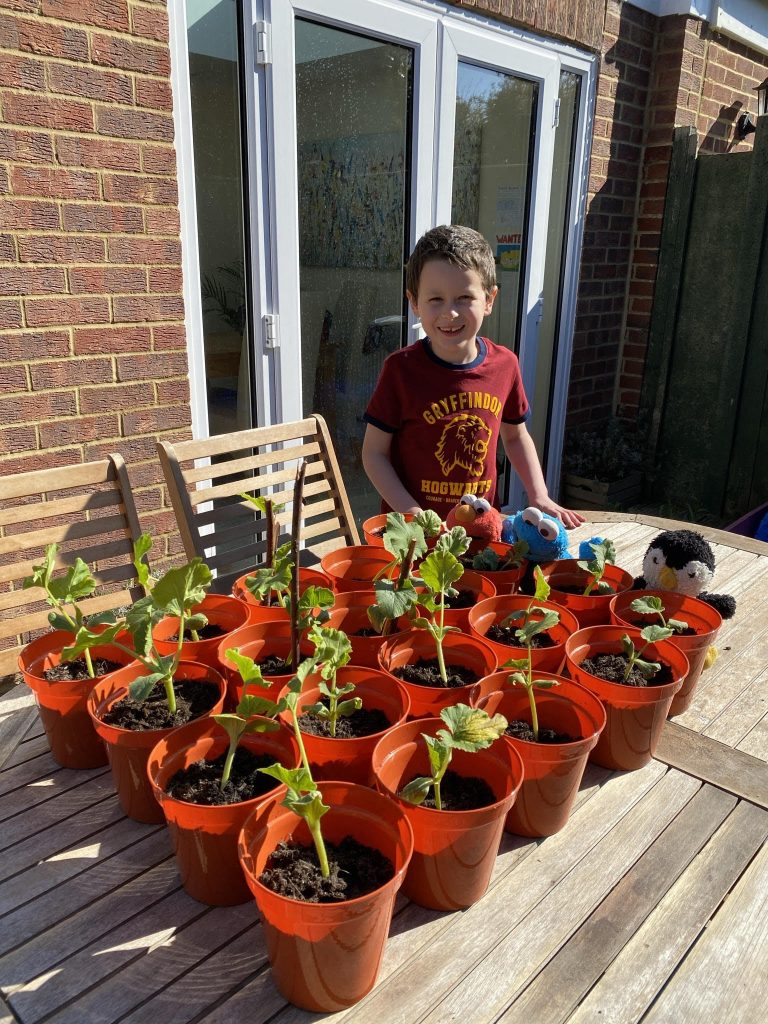
Now my Pumpkin Seedlings are getting bigger, I carefully moved them to some bigger pots. You have to be very careful when moving them and I would suggest you add some supports for the Pumpkin Plants to grow against.
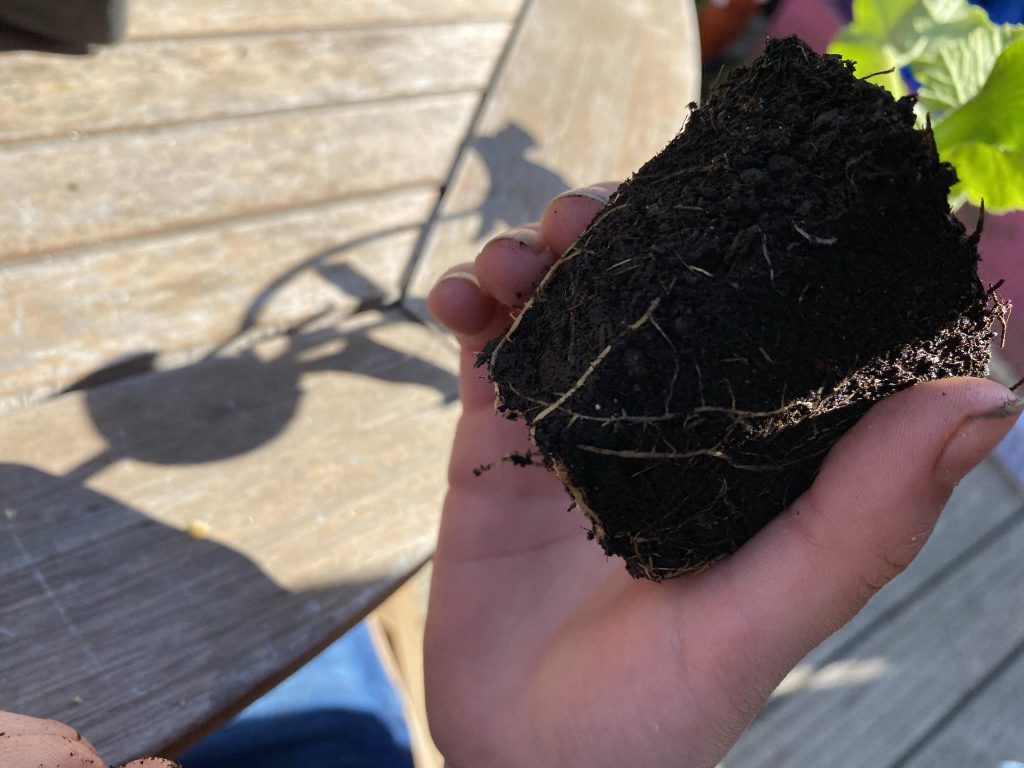
When replanting the Pumpkins, take a look at the roots. Against the mud, they look like thin white worms!! There should be a few roots dangling from the bottom, looking to find food in their new pots.
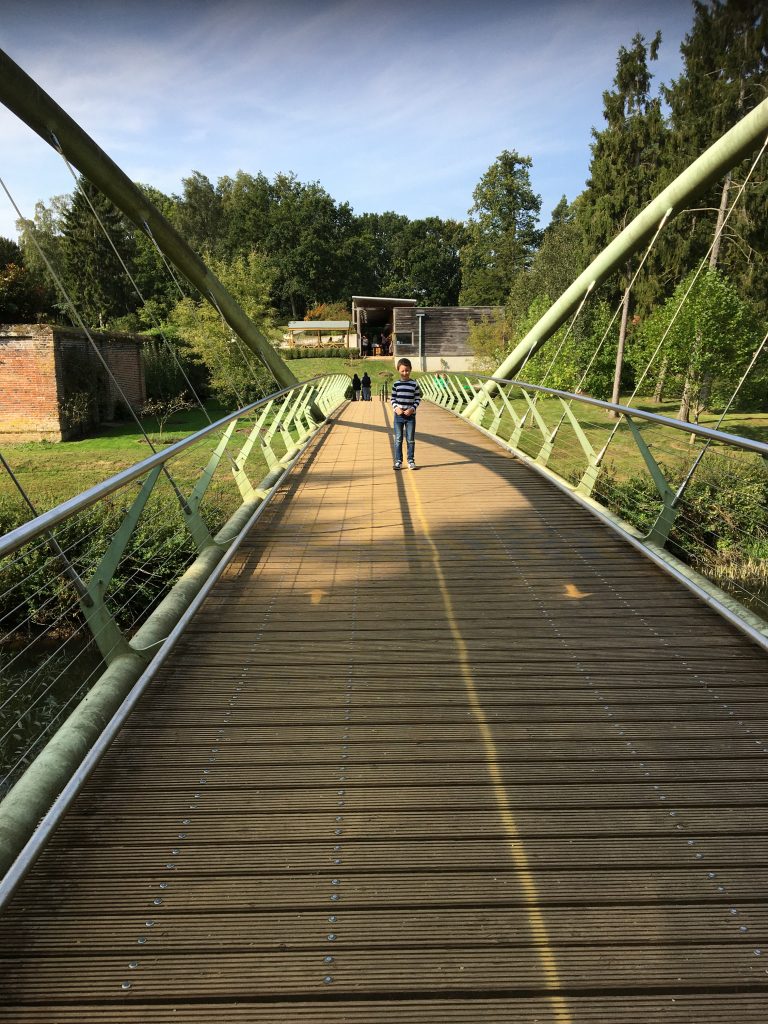
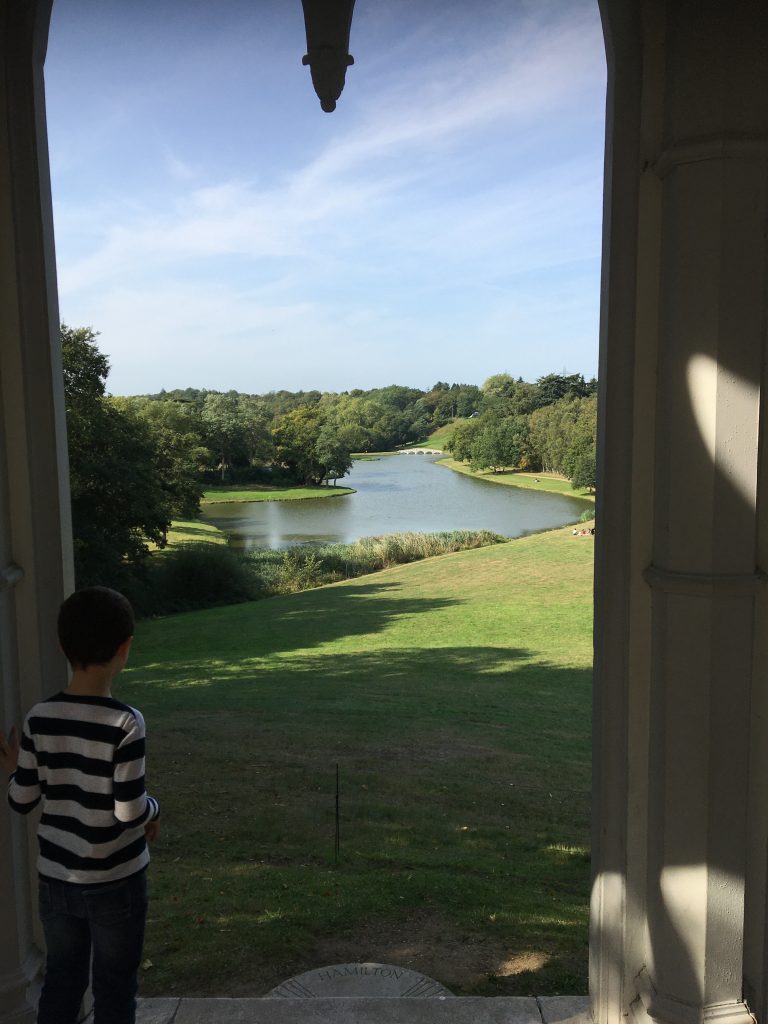
On the 19th September we went to Painshill Park, it was full of big trees and plants. To enter we want across a really cool bridge.
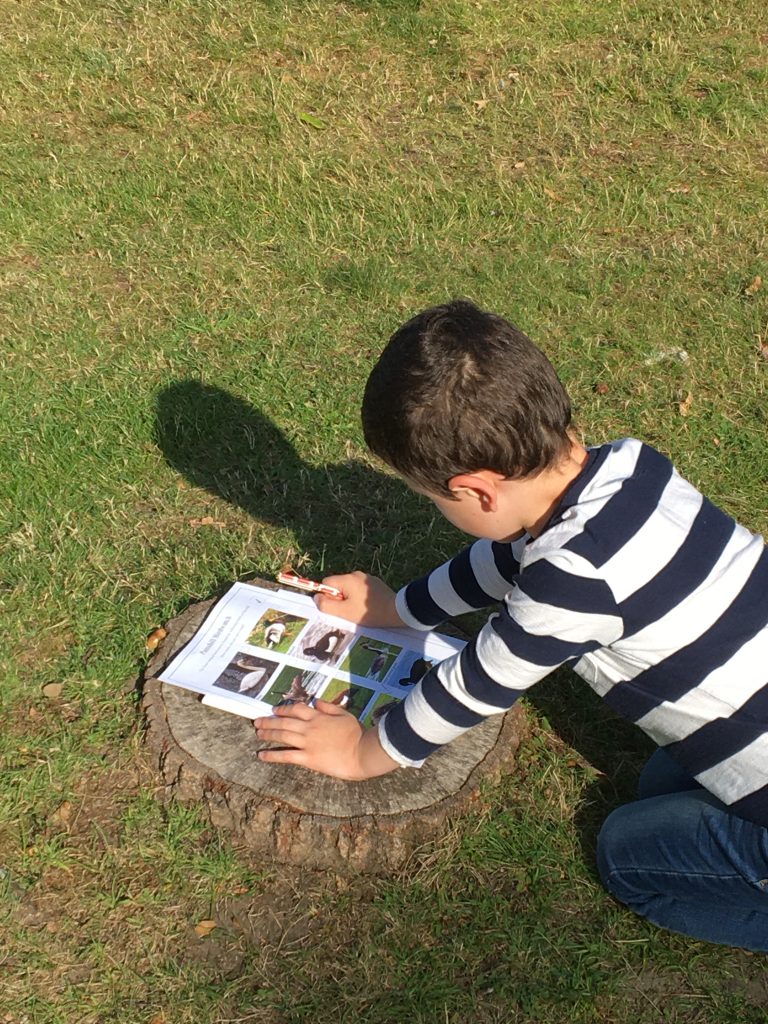
When collecting our tickets, guidebook and map, I was also given a Duck Hunt Challenge. I had to find a Swan, Mallard, Canada Goose, Tufted Duck, Egyptian Goose, Great Crested Grebe, Greylag Goose Cormorant, Heron and Coot.
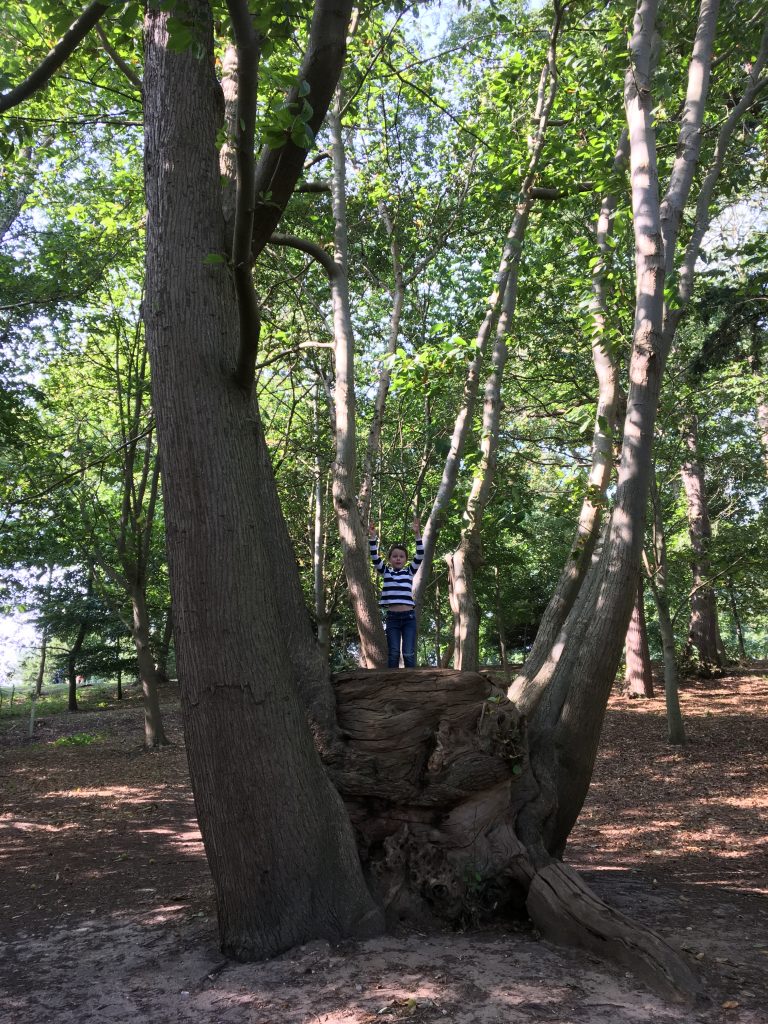
There was a choice of following the red or blue route, we took the red route, which started by passing a huge tree stump that I climbed with my sister.
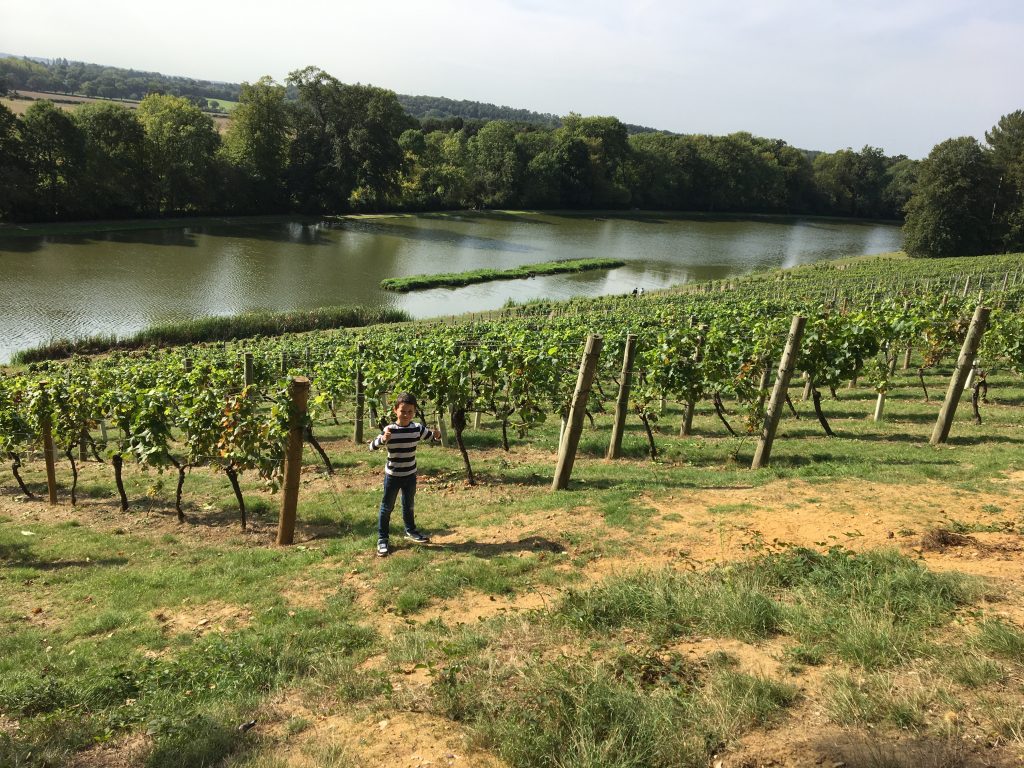
The Vineyard – Is a big field full of grape vines. The vineyard was on a slope that went down to an ornamental lake.
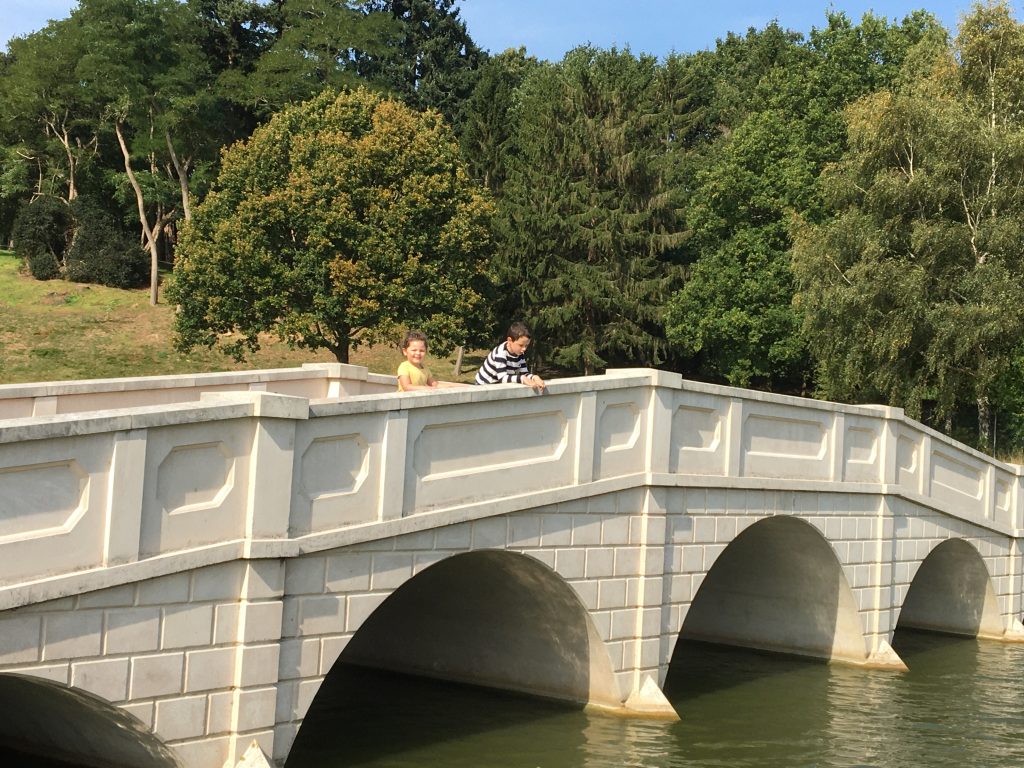
Gothic Tower – We could see the Five Arch Bridge from the Gothic Tower. The roof was very pretty.
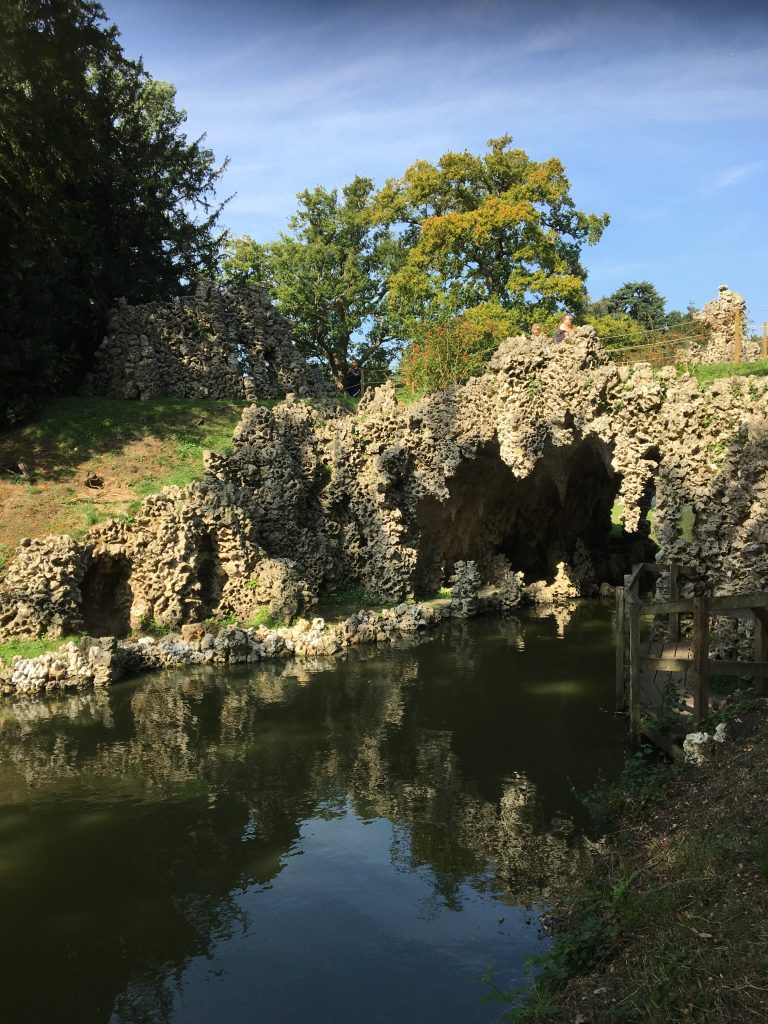
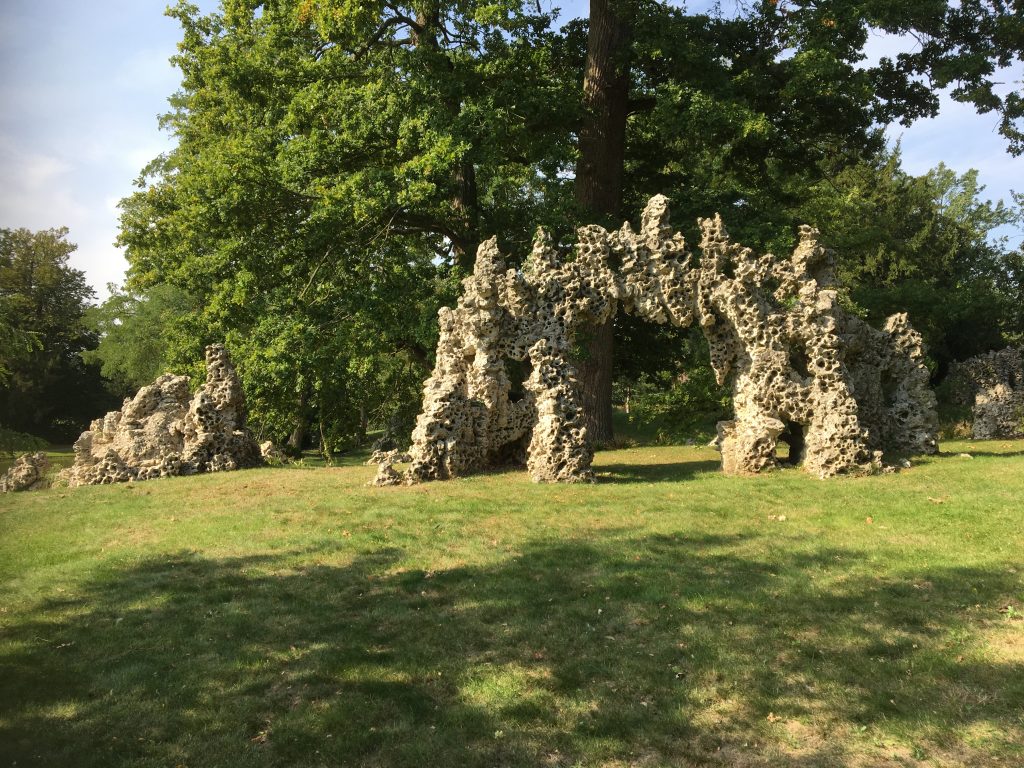
The Crystal Grotto – According to mythology, grottoes were portals to other worlds and the home of the nymphs, which are fairy spirits that look after nature.
Five Arch Bridge – Has five arches, as you would expect. It was where we changed routes to the Blue route.
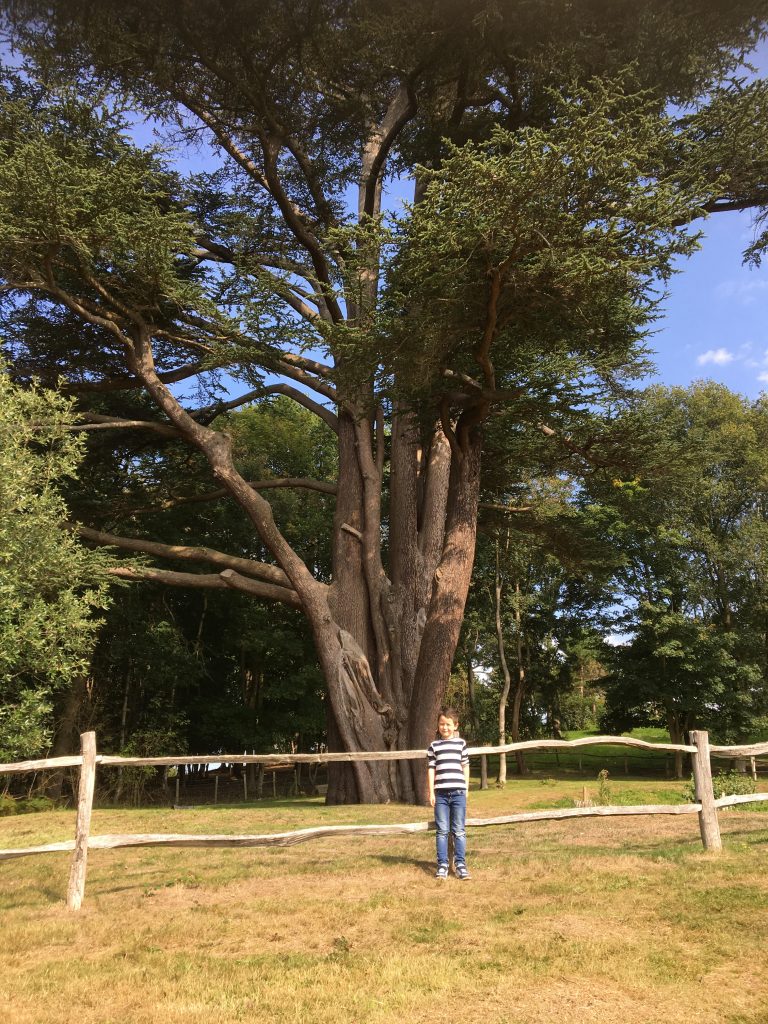
The Giant Cedar Tree – There were lots of cedar trees, but I found the biggest one. I spotted it from the Gothic Tower. I like Cedar Trees, because I’m in Cedar class at school
At the end of the route, Me and Mummy raced back to the shop for a yummy Cream Tea.
We had a lovely day, I would recommend Painshill to anyone who asked 🙂
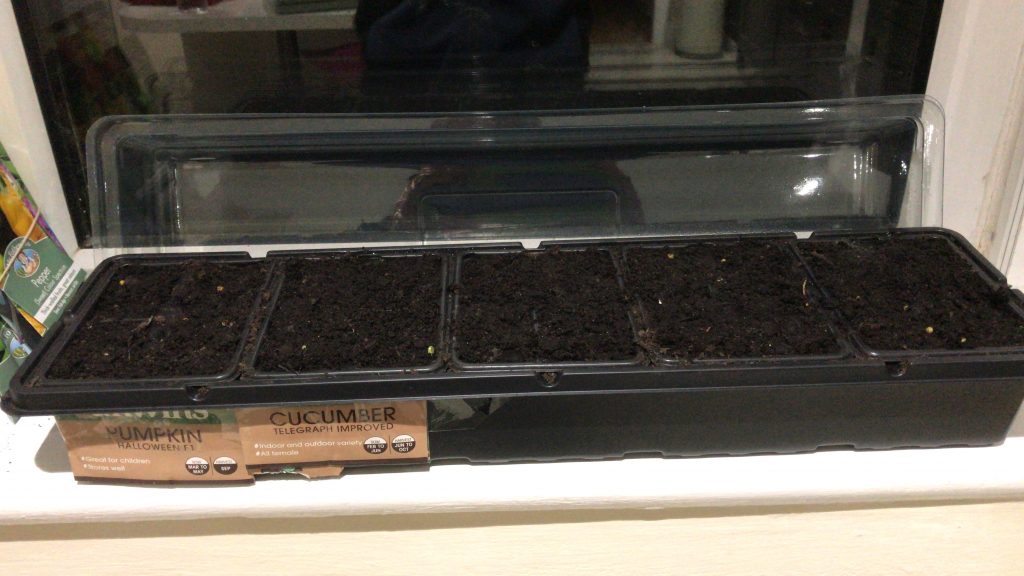
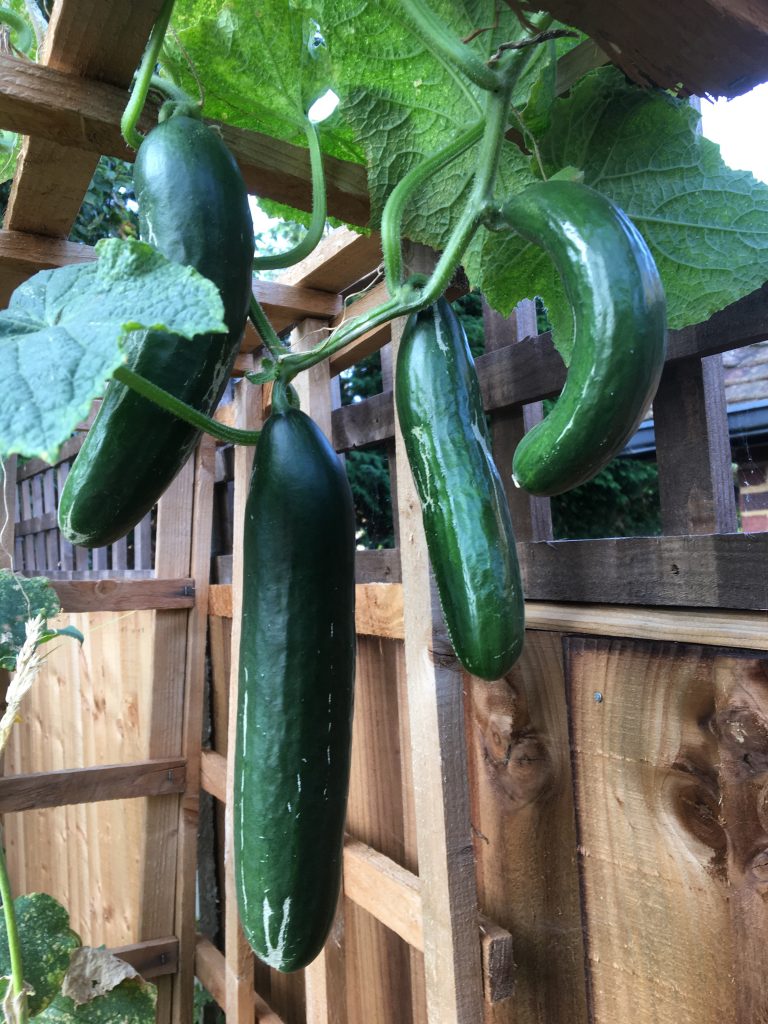
Early in Spring I planted Cucumber seeds into my plant tray and put it in my room. I sprayed water on them everyday to help them grow.
I waited for 3 weeks until the shoots started to grow. The cucumber plant grew towards the sun, so I had to turn the tray around 90 degrees every two days.
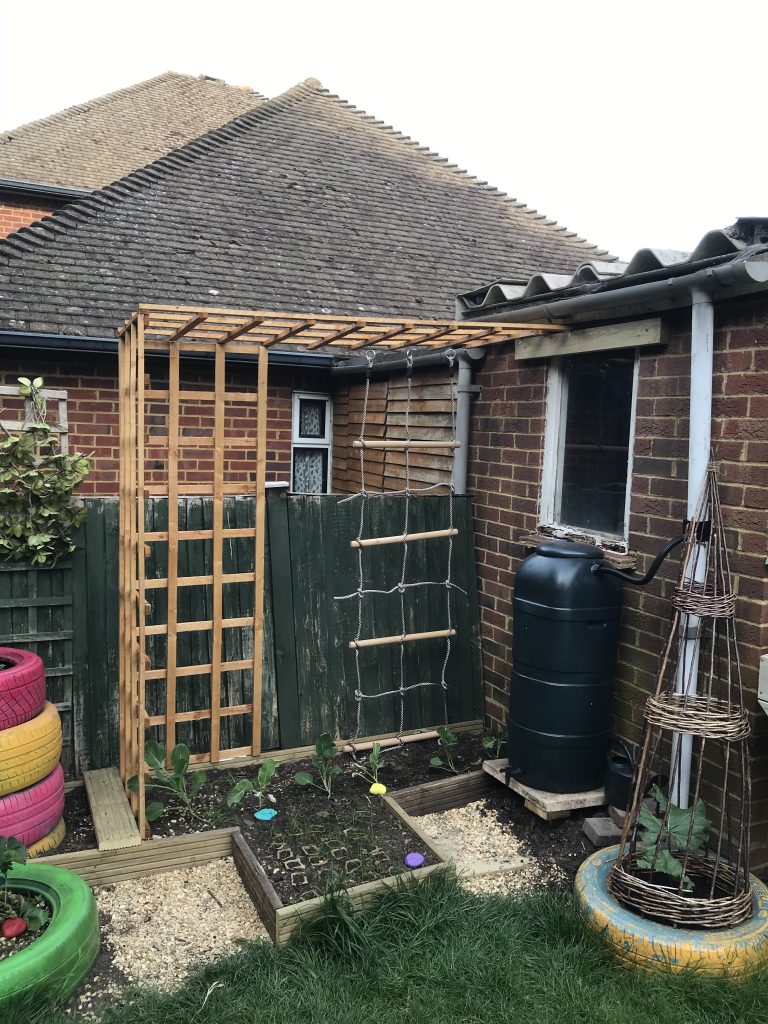
We built a climbing frame for the cucumbers.
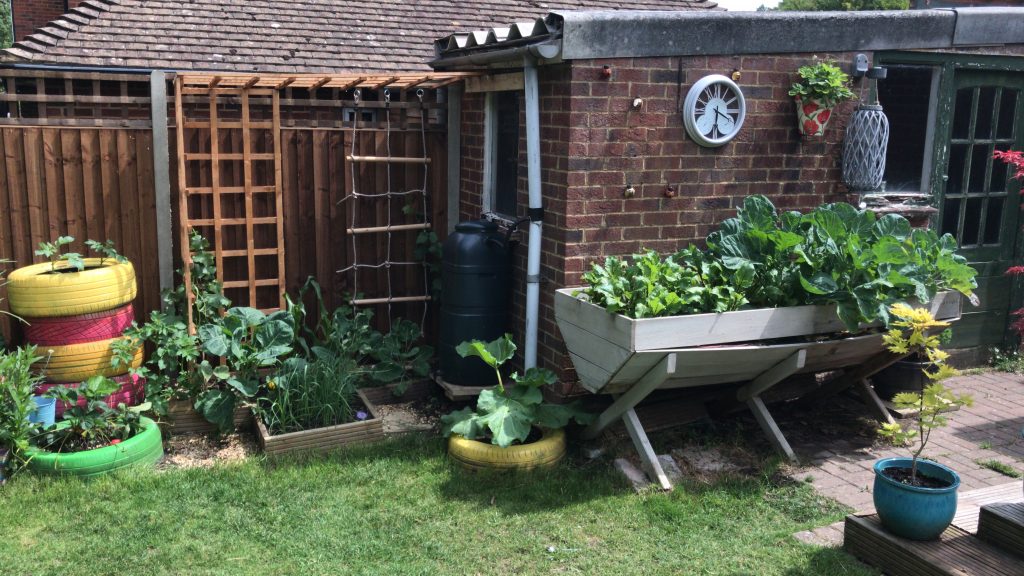
We planted the baby cucumber plants outside in early MayThey grew bigger and bigger every day.
Due to the hot weather I had to water them lots through the summer. In June they had already reached the top of the climbing frame. I harvested my first Cucumber in July and Mummy and Daddy have been eating them at lunch time.
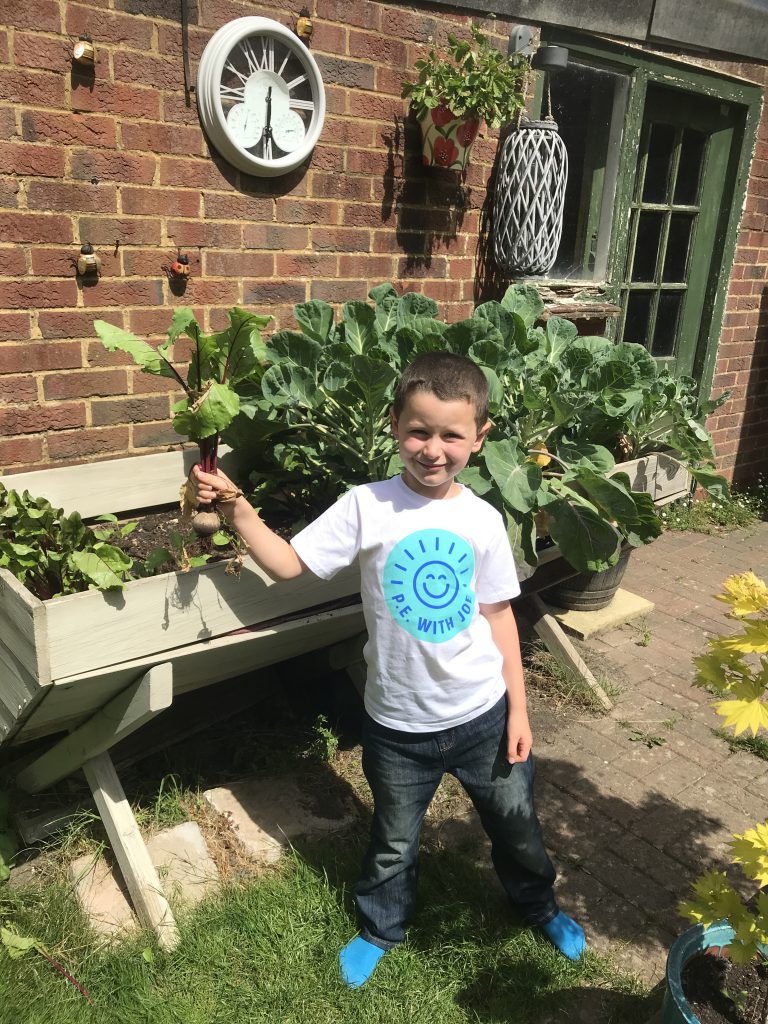
In my garden we grew beetroot, it started of in the greenhouse in March.
Then when they were big enough we planted them in the veggie table in May and watered them every day, and then it was time to harvest.
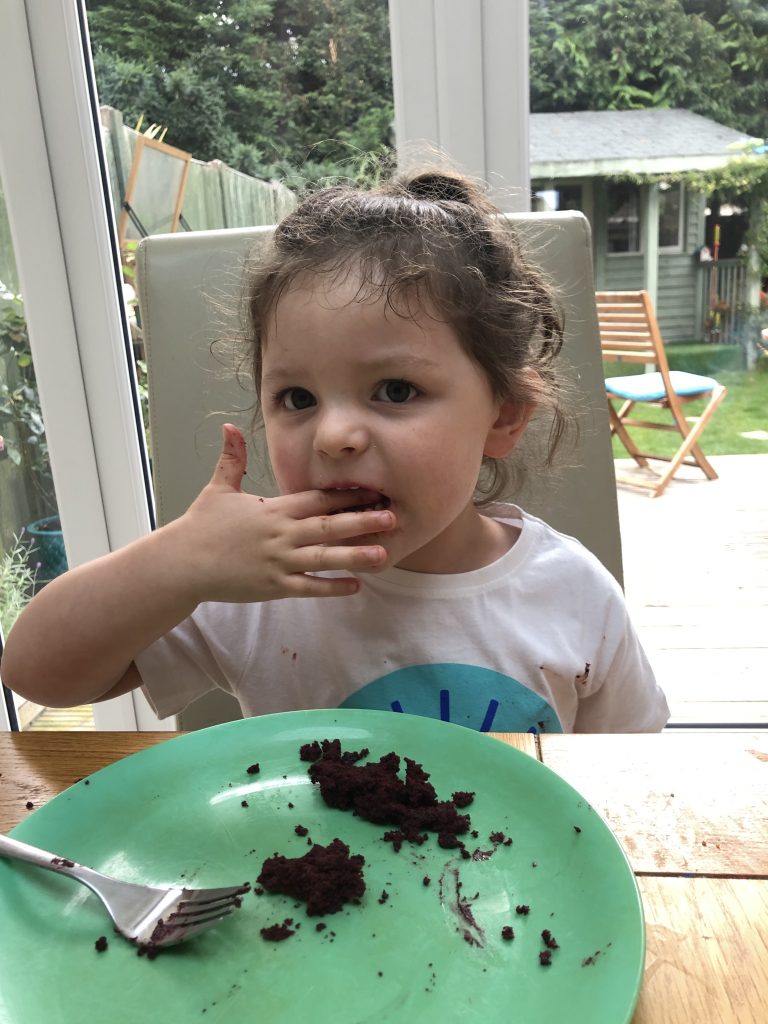
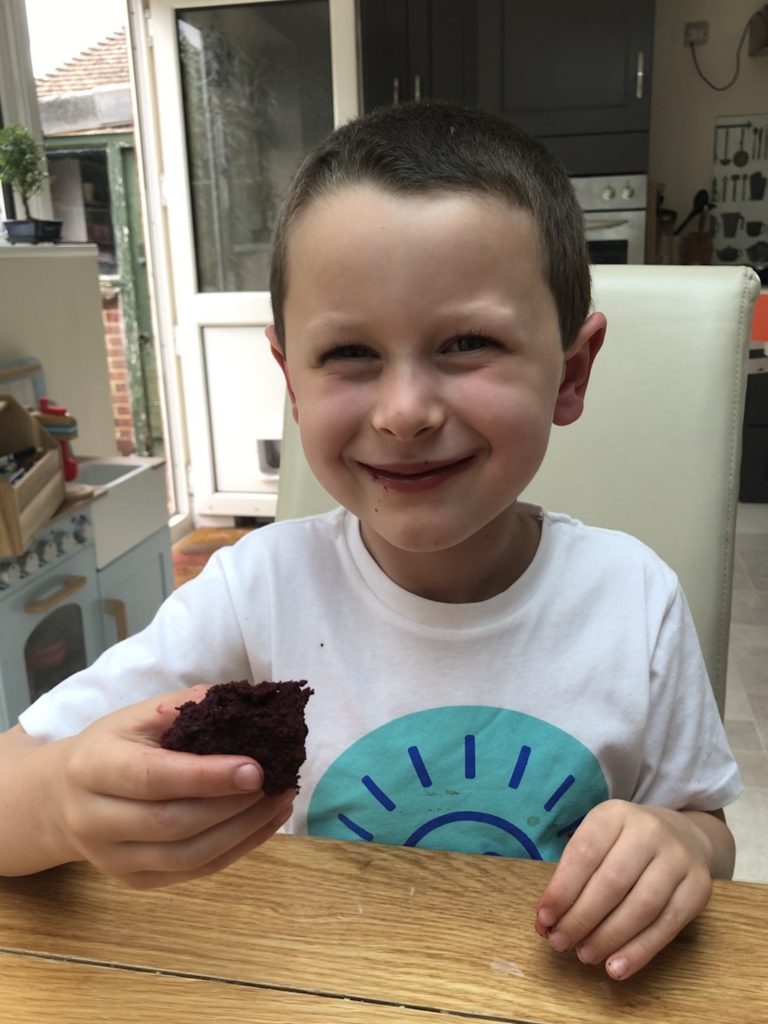
First we peeled and washed the beetroot. Then we cut 400 grams of the beetroot and mixed with a big bar of chocolate, mixing it until it was all smooth. After that it was ready to be cooked.
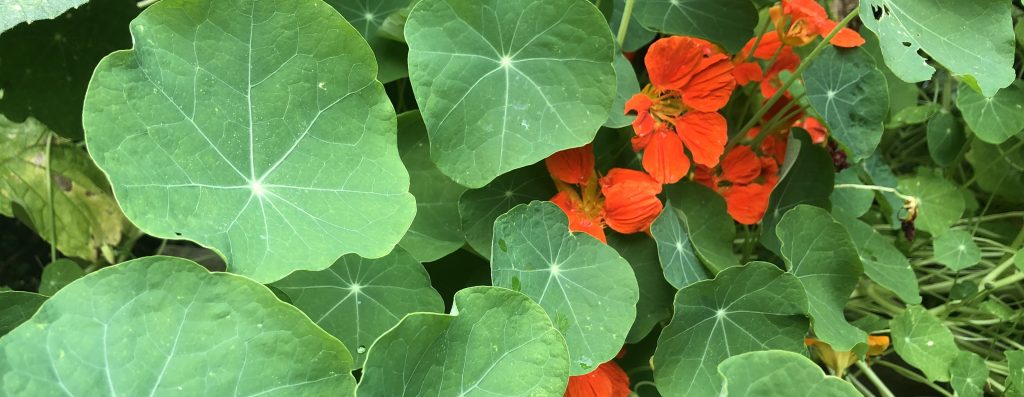
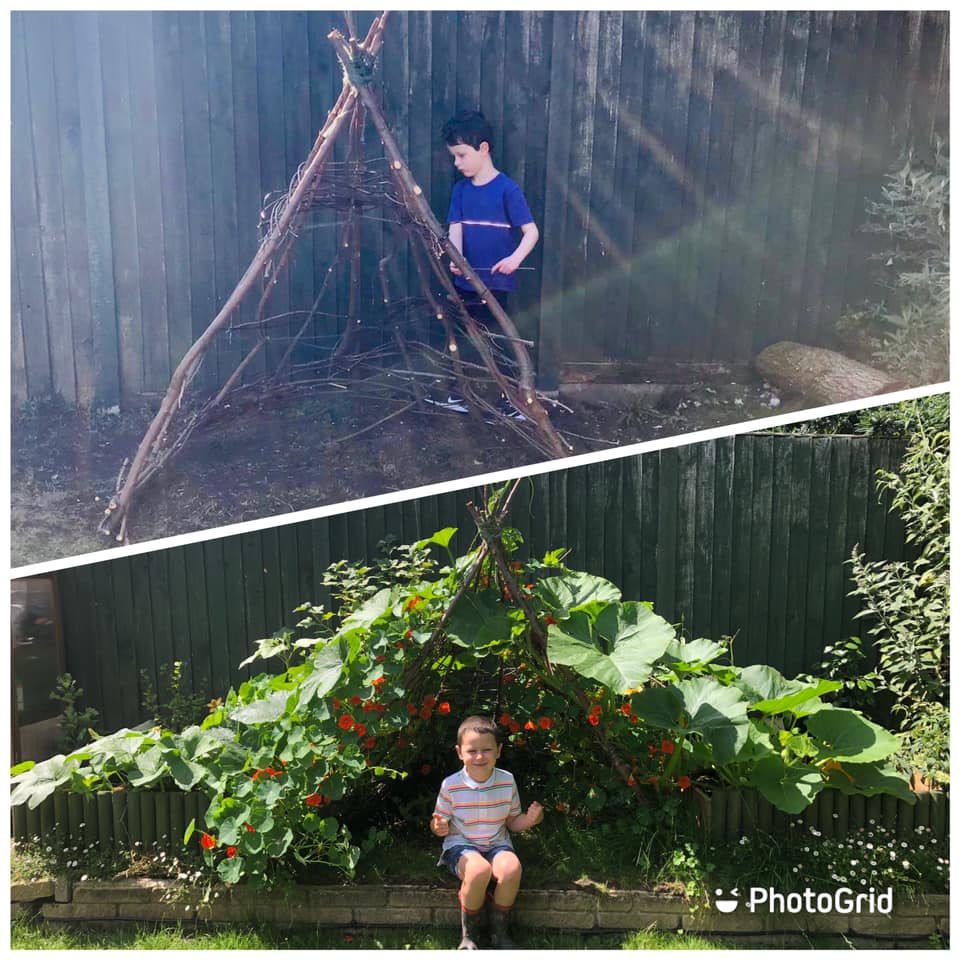
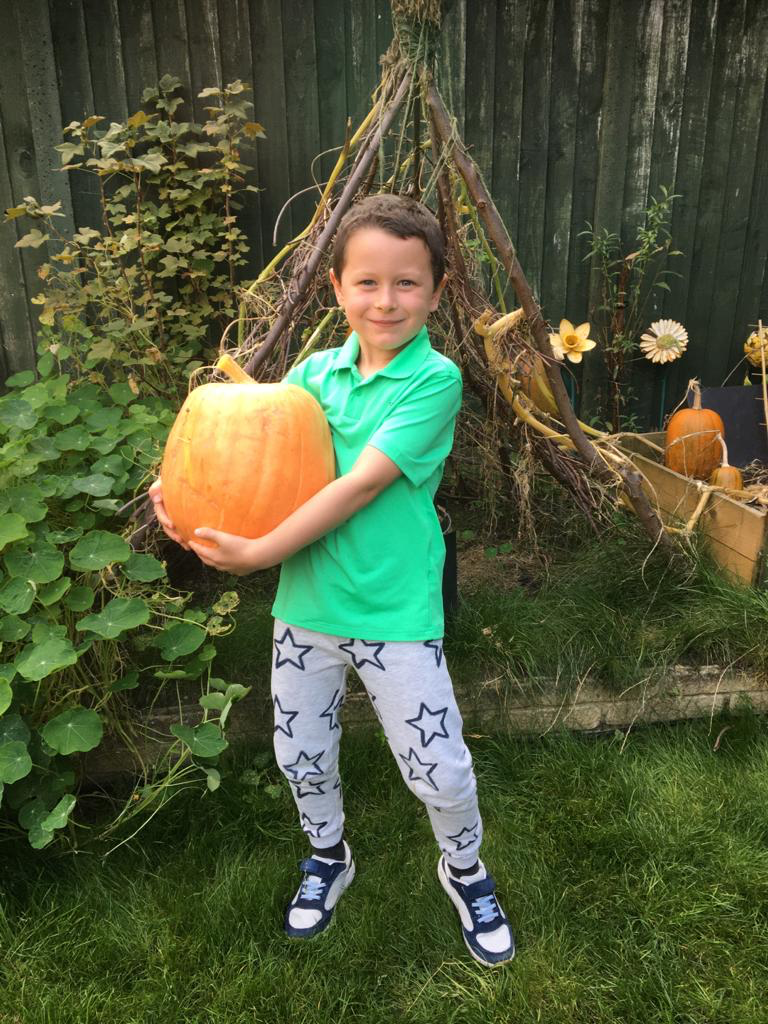
I started by getting big branches and cutting little ones off, it took 2 days. Next I built a wigwam that lasted 30 minuets. Then we planted the nasturtiums, it took 37 minutes. We grew nasturtiums to attract the bees.
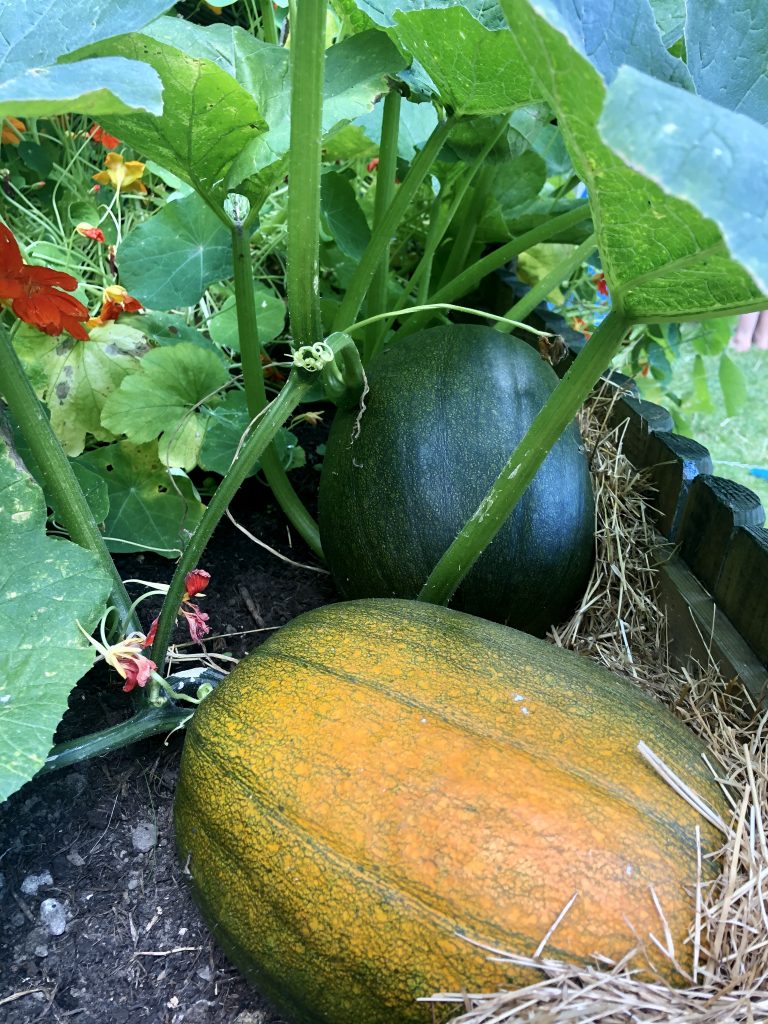
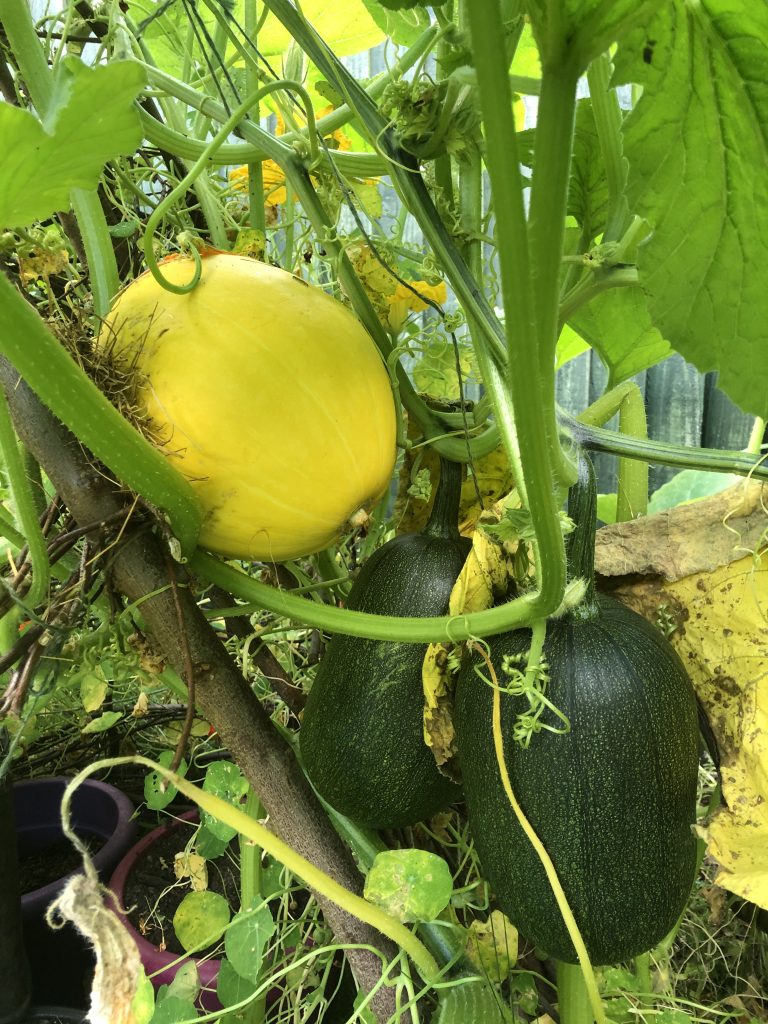
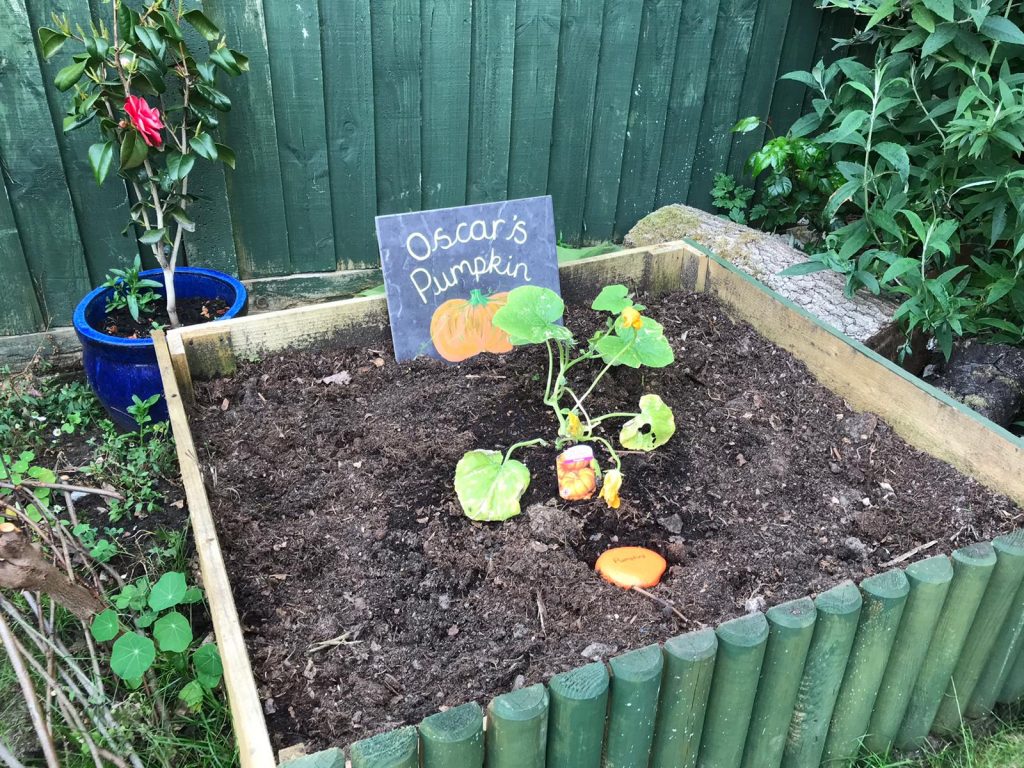
I planted 12 pumpkin seeds on my window sill and watered them everyday. When they were big enough we planted them in patches.
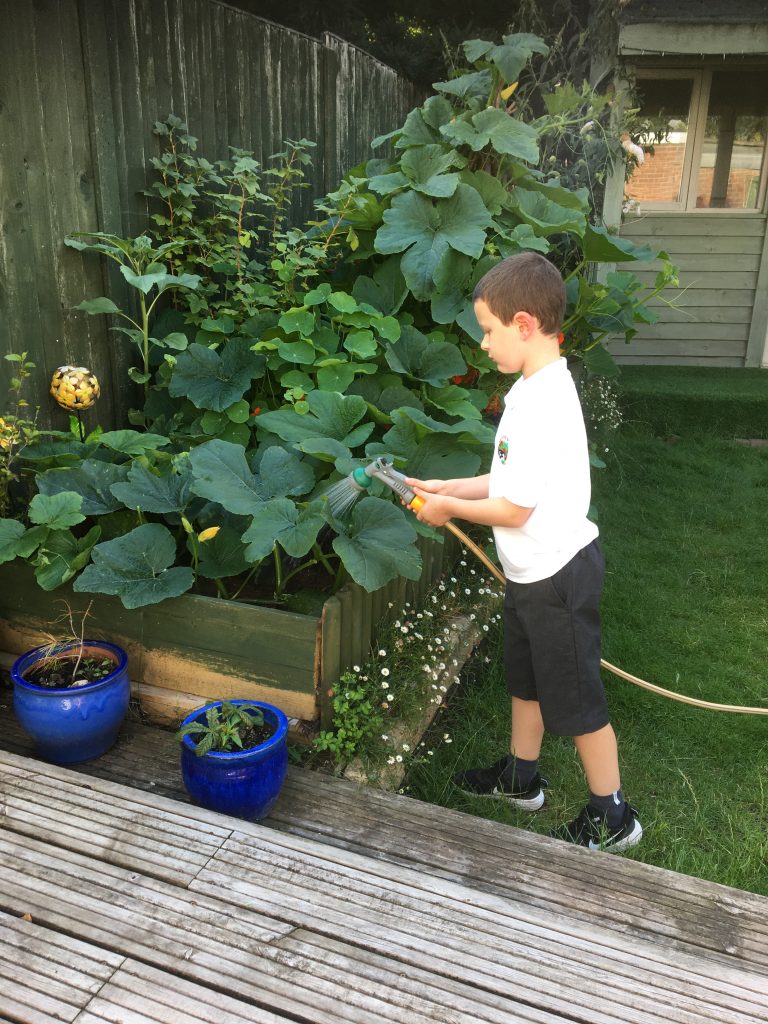
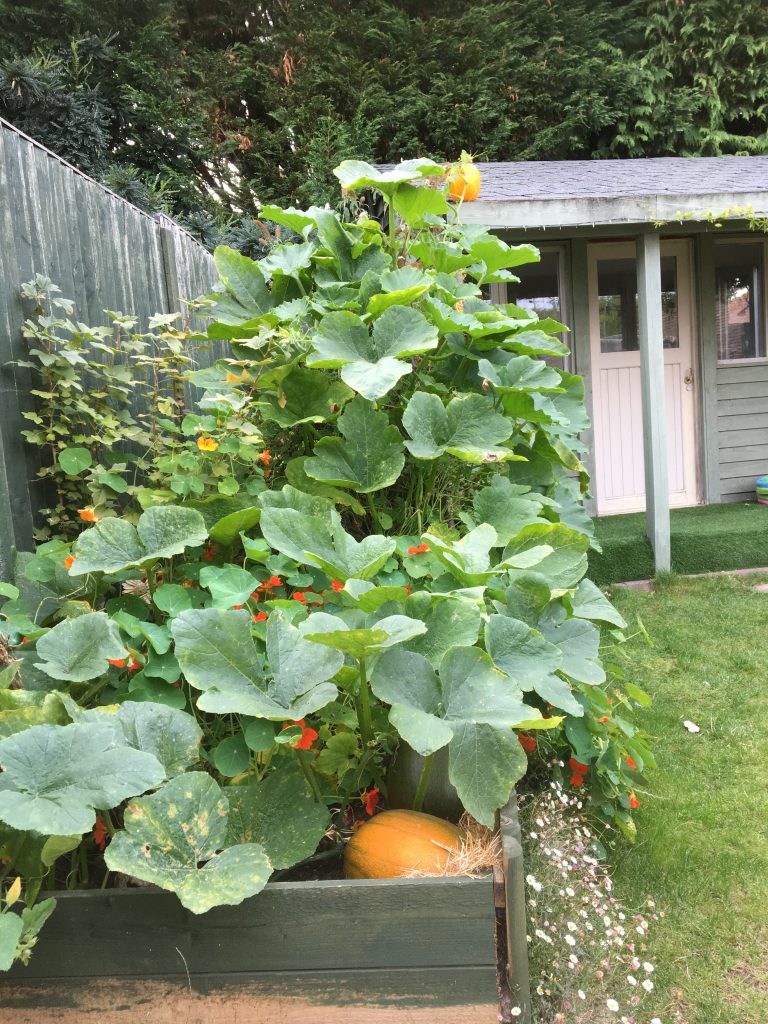
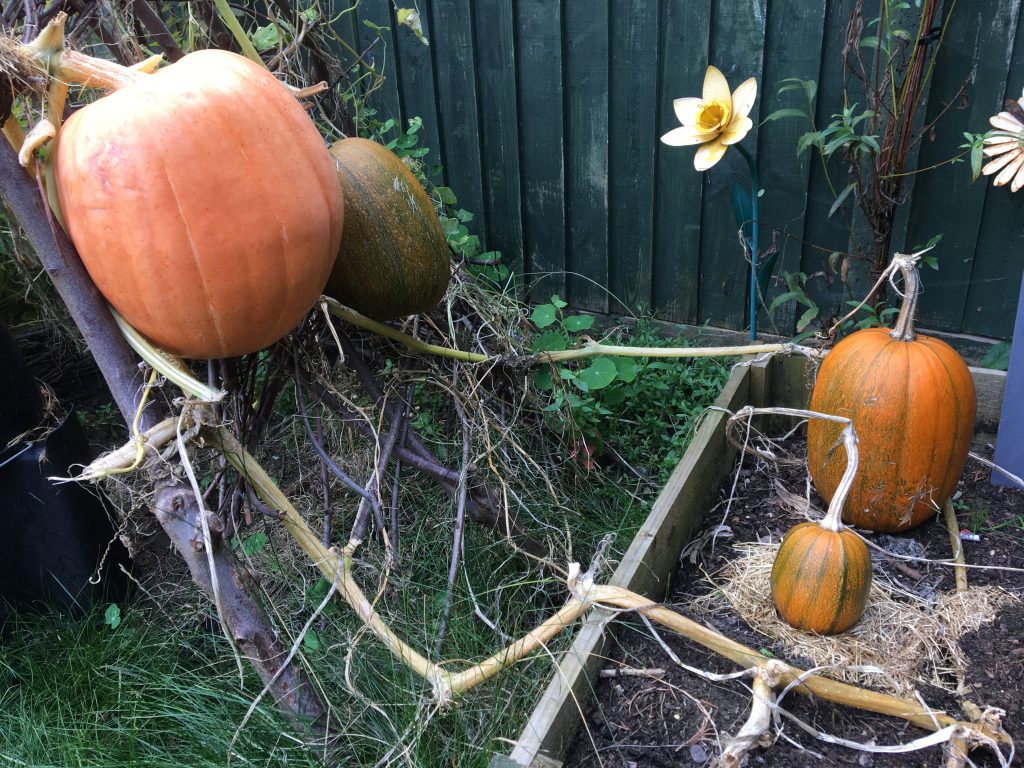
In April and may 2020 we watered them, fed them and helped them climb. In June and early July we saw boy and girl flowers. And now we have 7 pumpkins.
We have 2 different types of pumpkin plants.
Here is a my pumpkin gallery
Growing in my bedroom
First shoots
Planted in my pumpkin patch
Pumpkins love water
pumpkin jungle
Almost ready
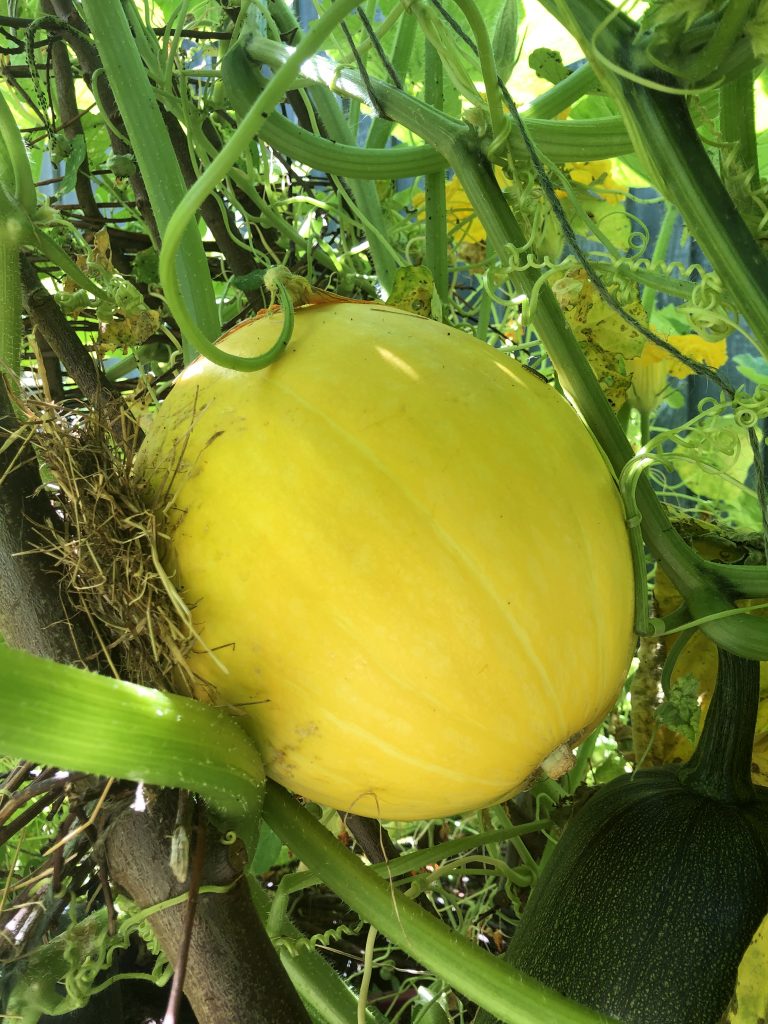
In September we harvested the biggest pumpkin to stop it falling off the vine. It was really big and really orange.